If you've been working with Canvas LMS, you've probably encountered this limitation: when you set your course home page to display a specific Canvas page (via Choose Home Page → Pages Front Page), all students see the same content regardless of which section they're enrolled in. Canvas doesn't natively support section-specific home pages.
But what if you want students in "Section 1" to see different home page content than students in "Section 2"? That's exactly what we'll solve today using an LTI 1.3 tool.
Prerequisites
Before diving in, make sure you're familiar with LTI 1.3 basics and Canvas configuration:
These posts cover the foundational concepts of LTI flow, JWT validation, and basic Canvas configuration.
The Solution Overview
We'll use an LTI 1.3 tool combined with Canvas API and iframe embedding:
- Create separate pages for each section following a naming convention
- Configure custom fields in the LTI Developer Key to pass section information
- Create a "Dynamic Home Page" that embeds our LTI tool via iframe
- The LTI tool detects the student's section and fetches the appropriate content using Canvas API
- The content is returned and displayed seamlessly
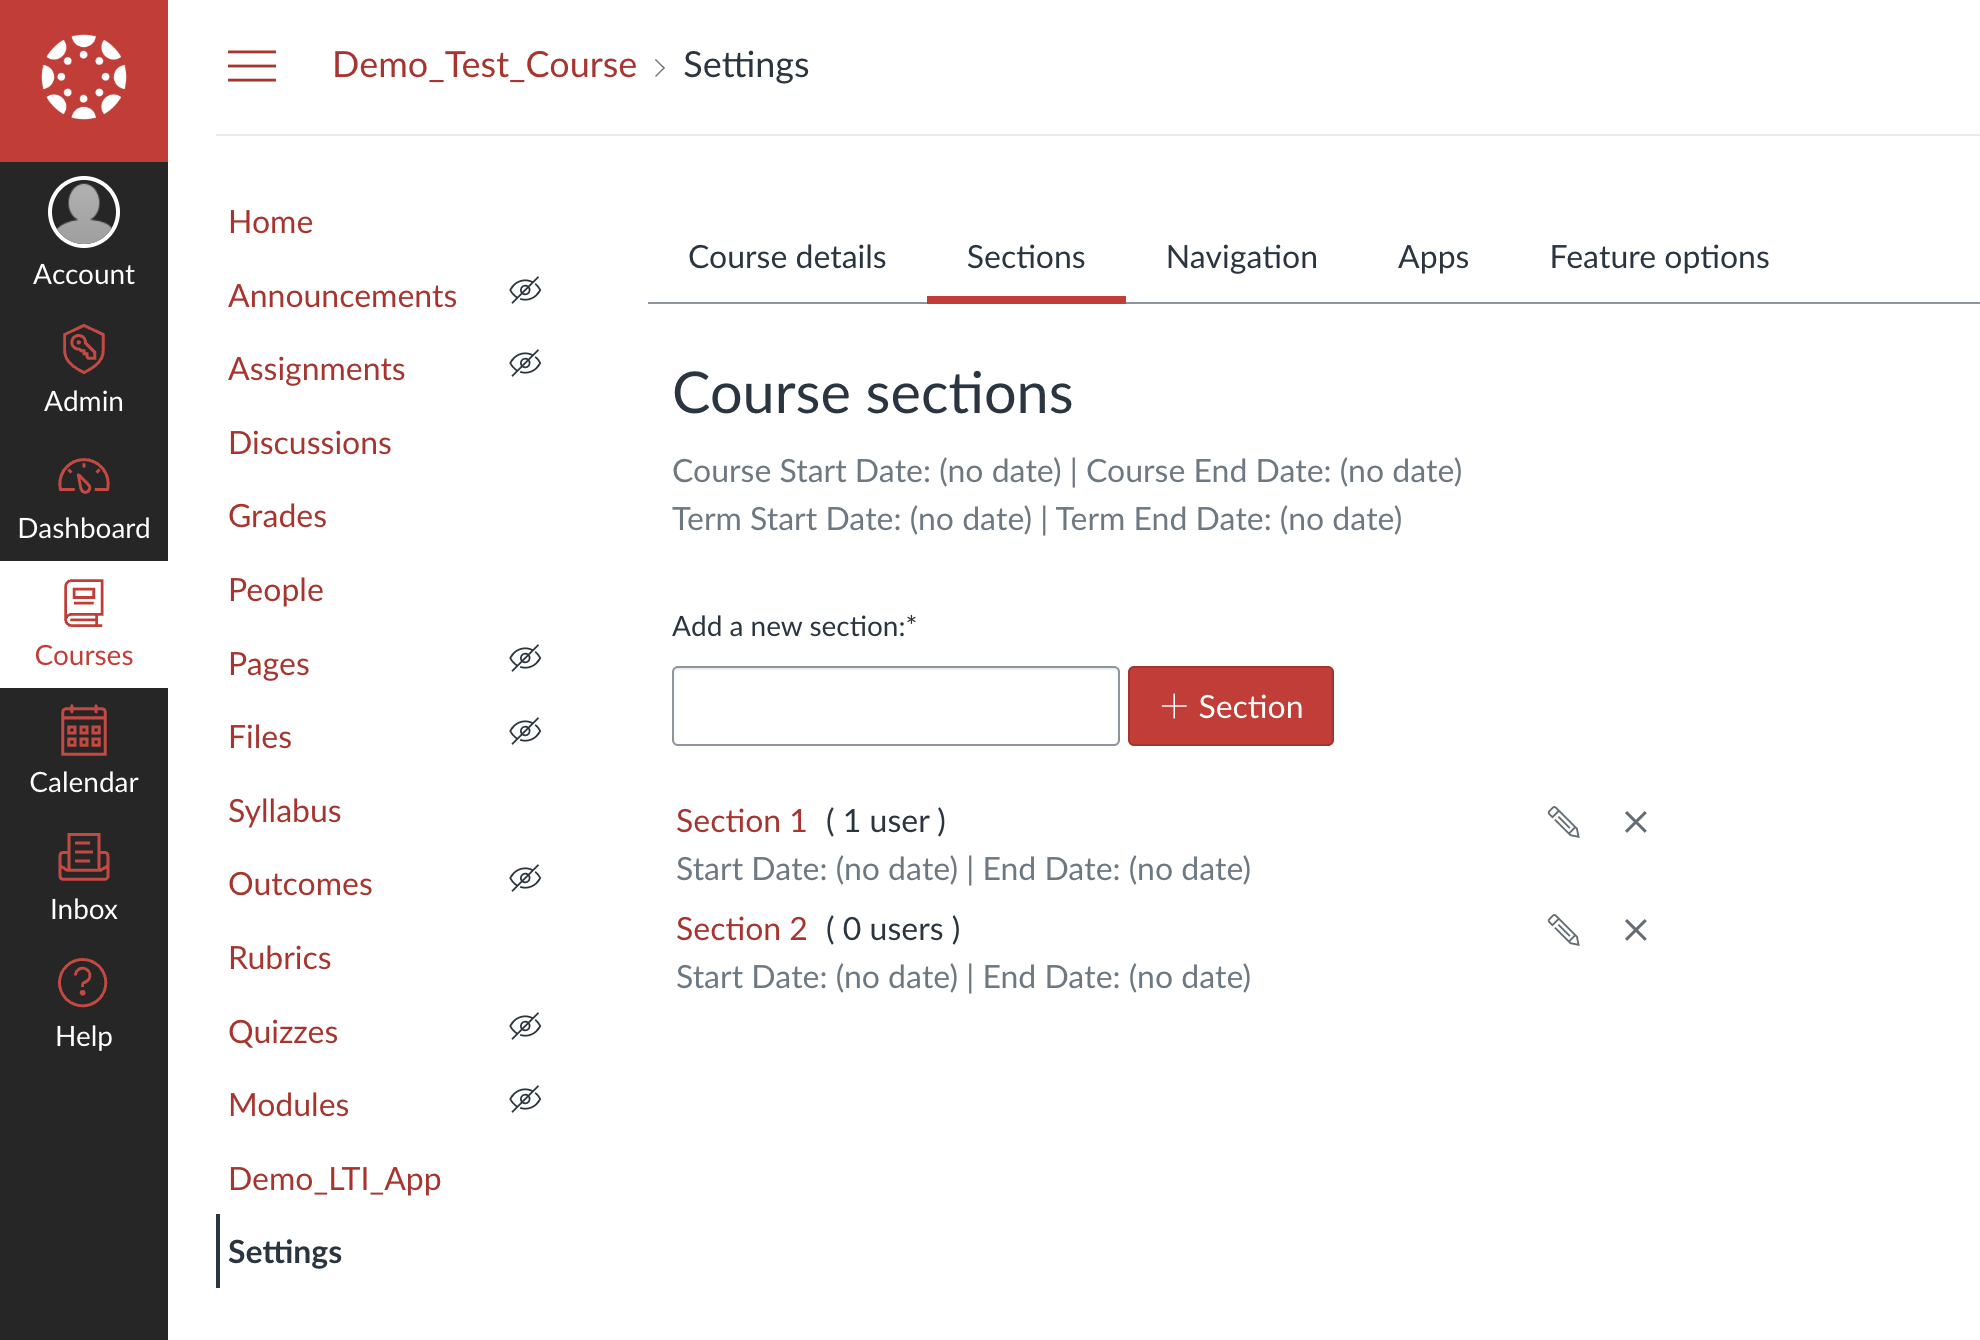
Step 1: Create Course Sections
Set up your course sections:
- Go to Settings → Sections tab
- Click Add Section
- Create your sections (e.g., "Section 1", "Section 2")
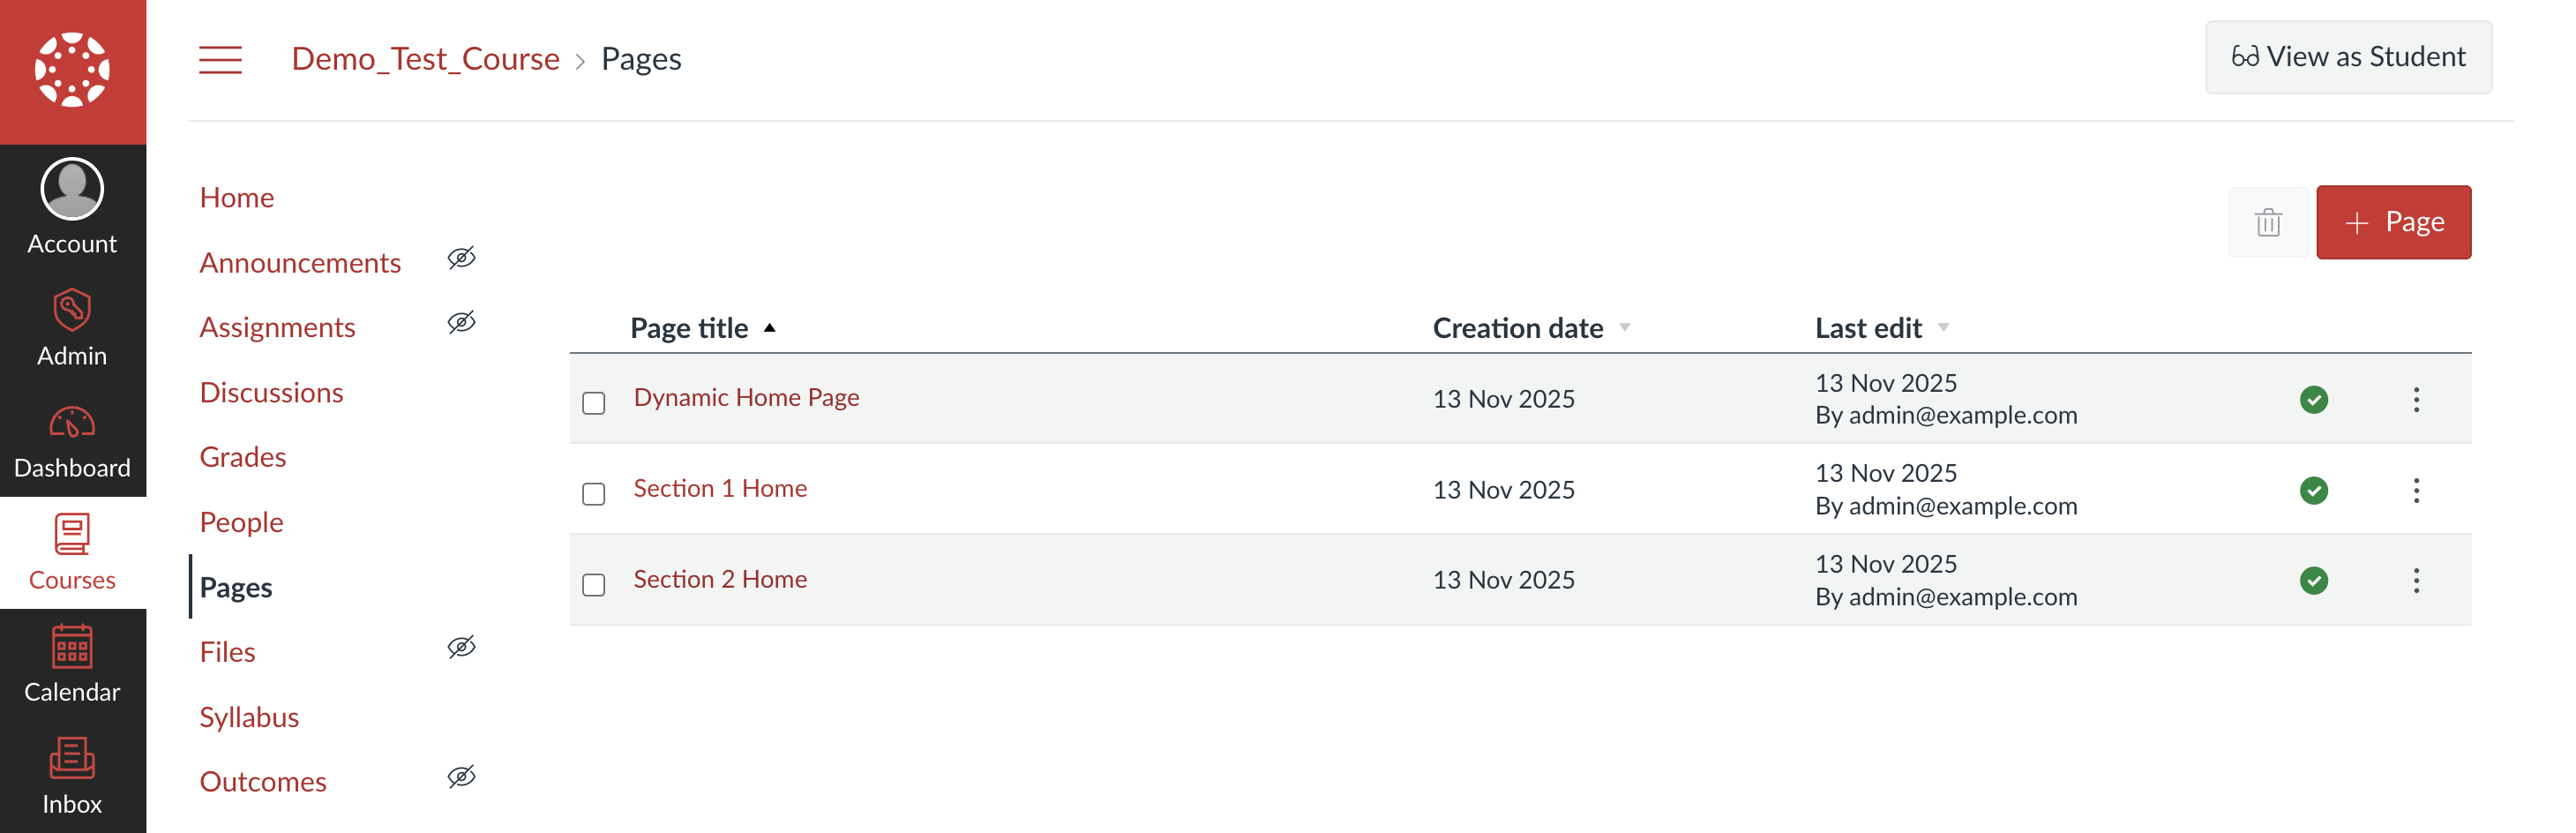
Step 2: Create Section-Specific Pages
Create pages that will hold section-specific content:
- Go to Pages
- Create three pages:
- Dynamic Home Page (leave empty for now)
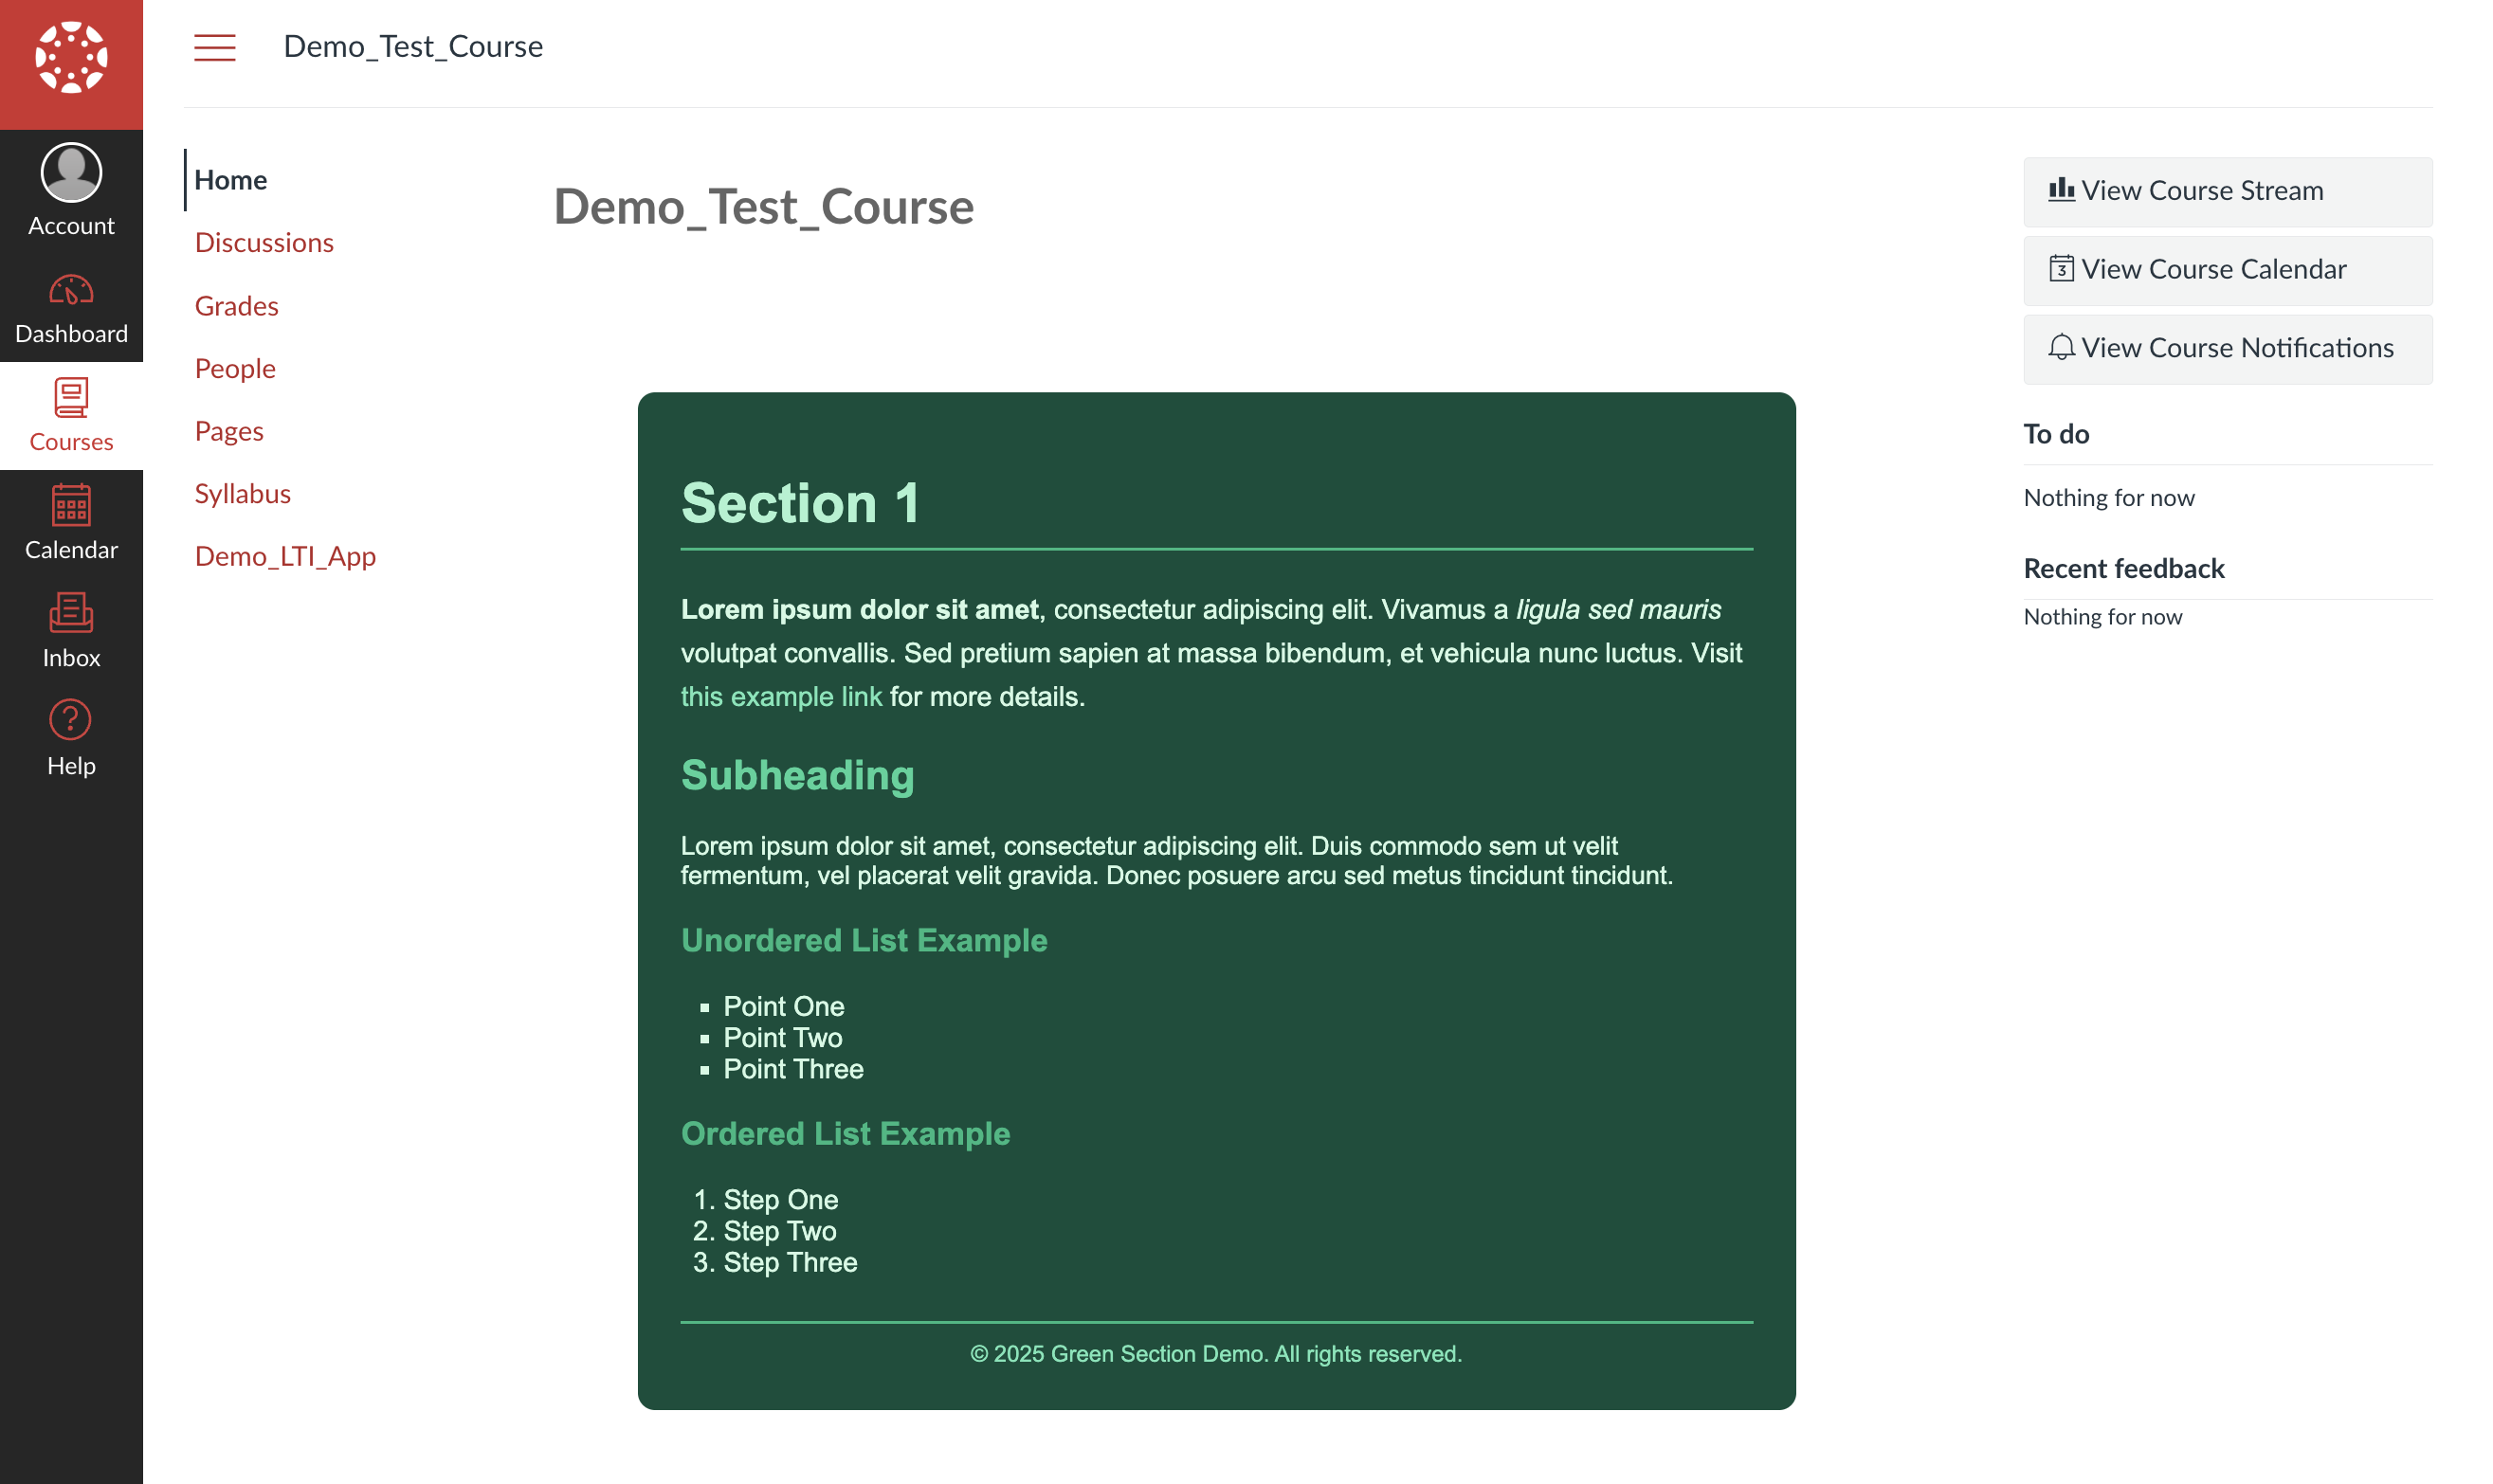
- Section 1 Home (add section 1 content)
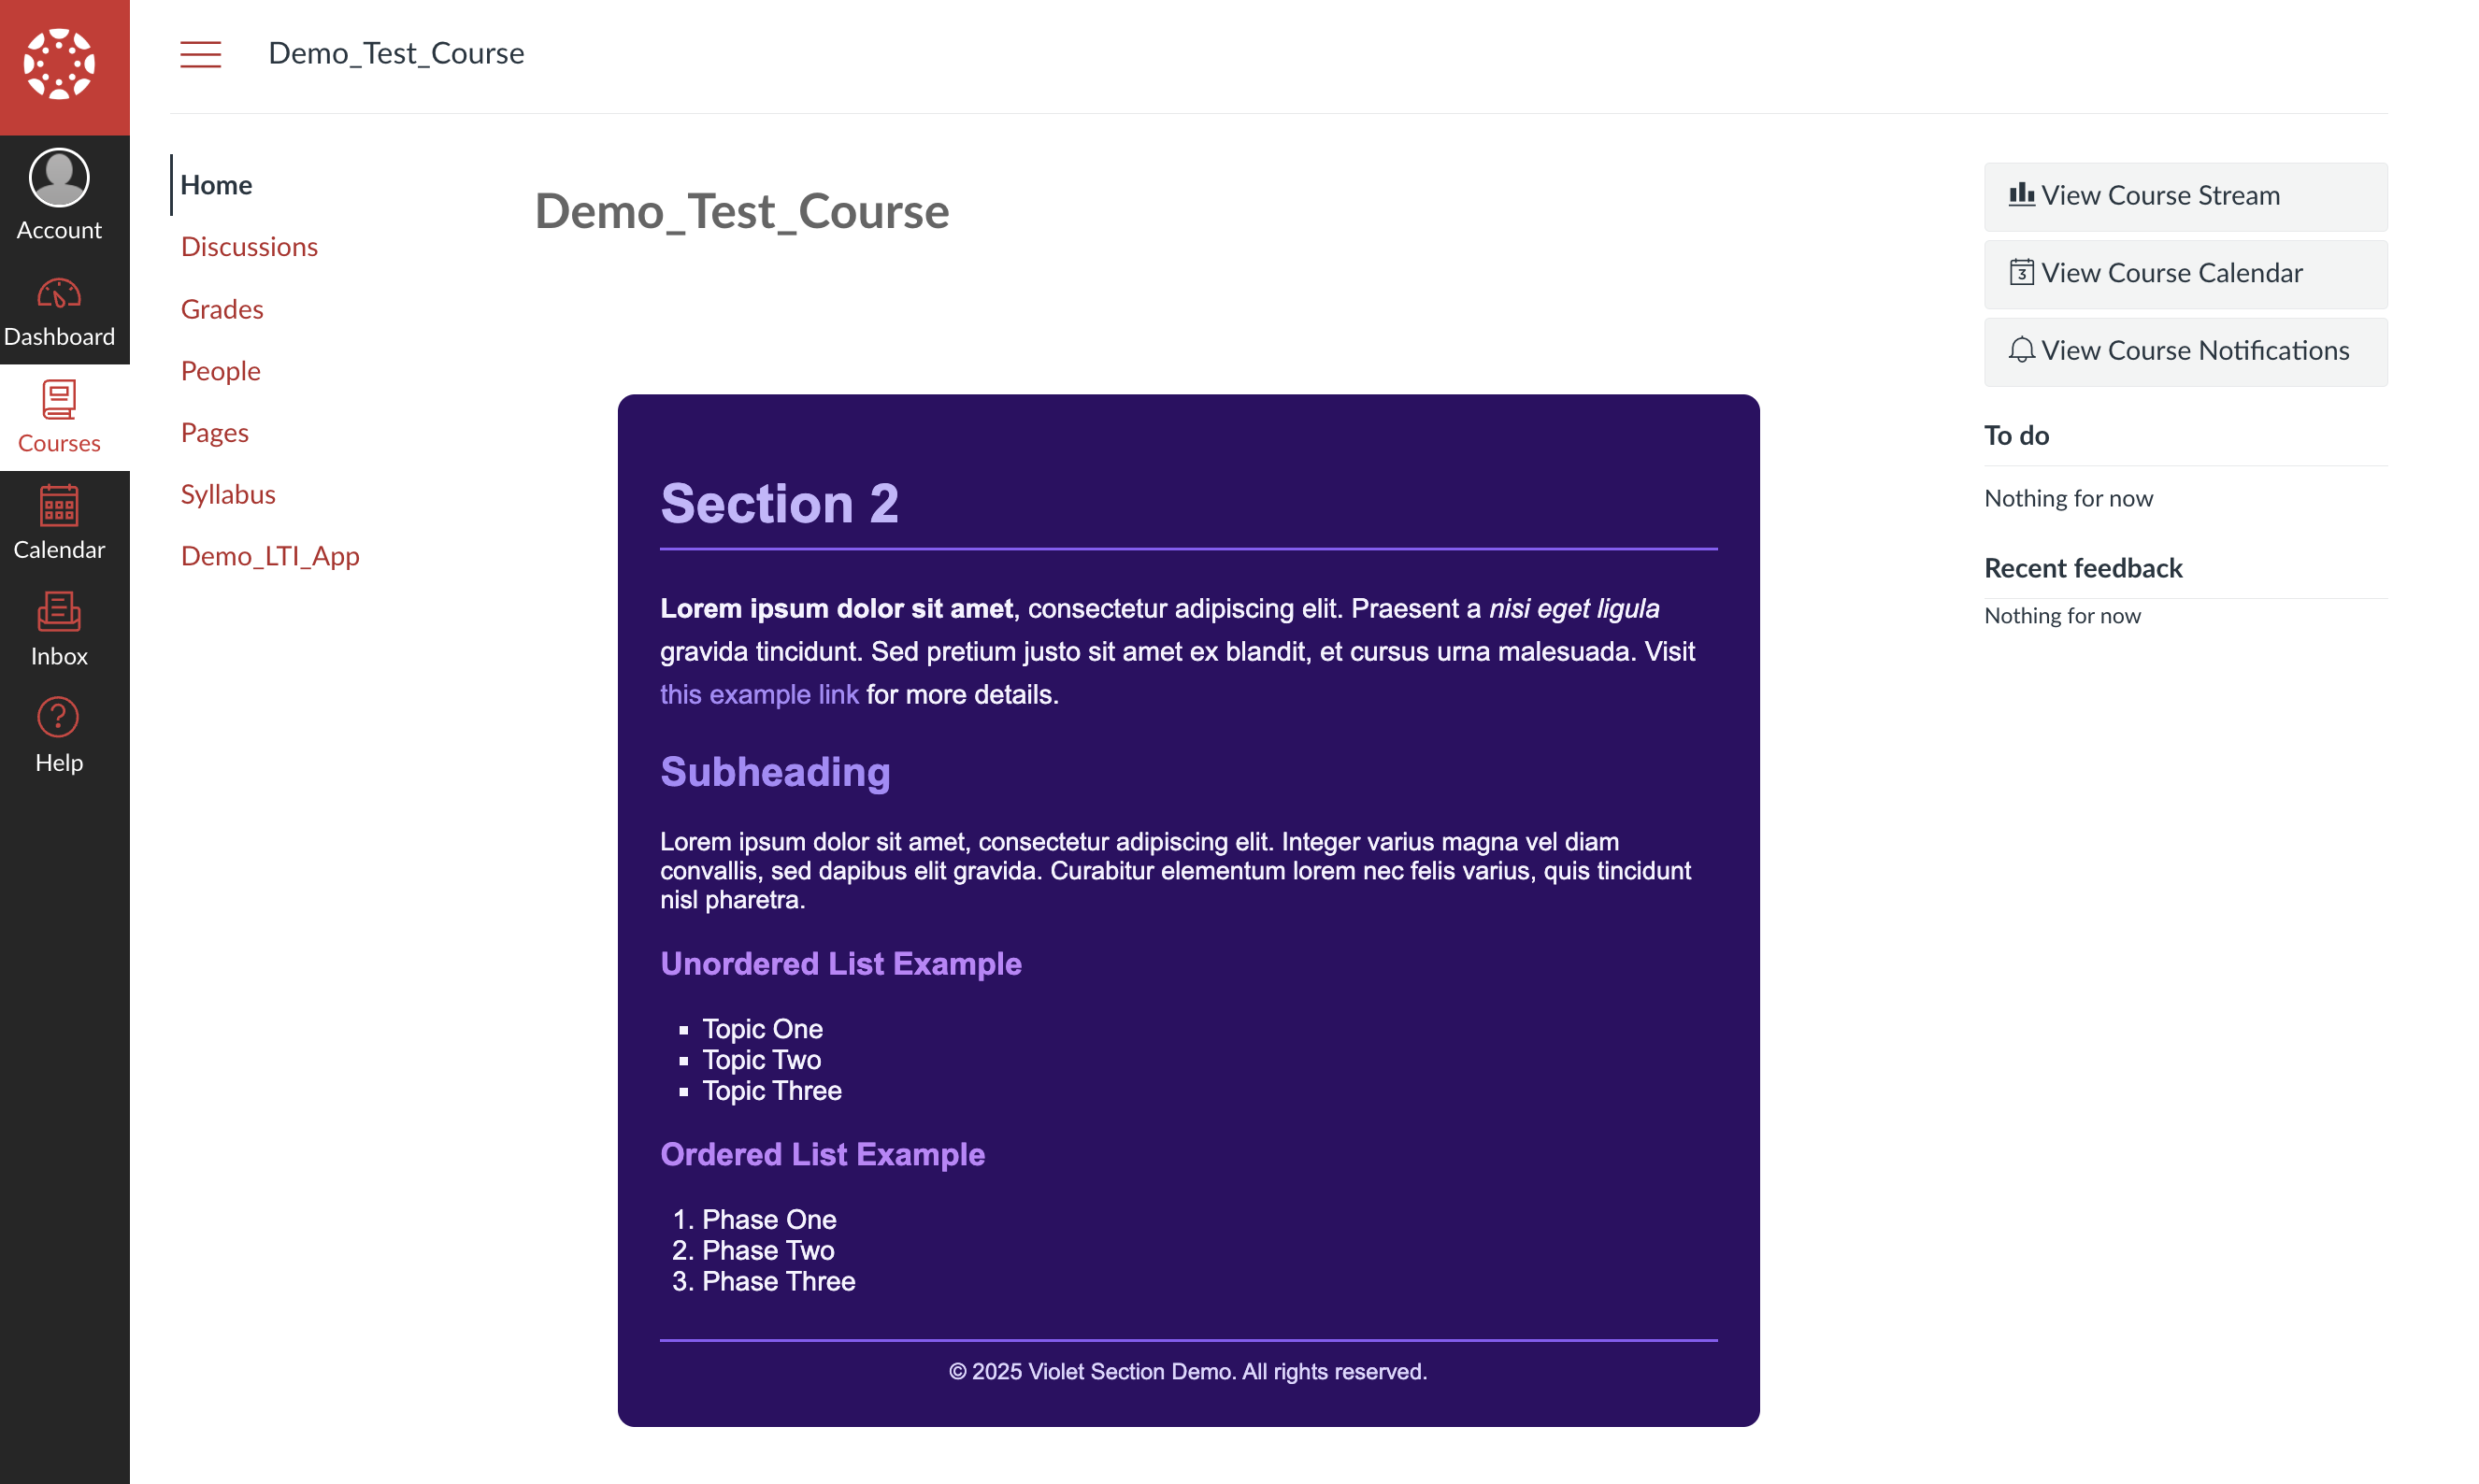
- Section 2 Home (add section 2 content)
Important Naming Convention: Section pages must follow this pattern:
<Section Name> + " Home"If your section is "Section 1", the page must be "Section 1 Home"—this is critical for the tool to work.

For the section pages, add any HTML content you want. Make each section visually distinct so you can easily tell them apart during testing. You can use different color schemes, layouts, or content. For example HTML templates with different styles, check out these sample section page templates.
Step 3: Configure LTI Developer Key with Custom Fields
Configure your LTI tool to receive section information from Canvas.
Basic LTI Settings
In Canvas Admin → Developer Keys:
- Key Name: Your app name
- Redirect URIs:
https://your-tool.com/lti/launch - Target Link URI:
https://your-tool.com/lti/homepage - OpenID Connect Initiation URL:
https://your-tool.com/lti/login - JWKS URL:
https://your-tool.com/lti/jwks
Add Custom Fields
Under Additional Settings, add these custom fields:
canvas_course_id = $Canvas.course.id;
com_instructure_user_section_names = $com.instructure.User.sectionNames;
These variables pass the course ID and the student's section names to your tool during LTI launch.
Learn More: For all available Canvas variables, see the Canvas LTI Variable Substitutions Documentation.
For a complete list of recommended custom fields, check these custom field configurations.
Configure Wiki Page Menu Placement
Under Placements, select Wiki Page Menu:
- Target Link URI:
https://your-tool.com/lti/homepage

This placement is perfect because it's rarely used and doesn't appear in student view by default. Once configured, save your developer key.
Step 4: Install the LTI App
- Toggle the developer key to ON ✅
- Go to Settings → Apps → + App
- Select By Client ID
- Paste your Client ID and click Install
Note: If you modify your Developer Key later, uninstall and reinstall the app for changes to take effect.
Step 5: Get the LTI Launch URL
- Go to Pages
- Click the three-dot menu (⋮) next to any page
- Click your LTI app name (e.g., "Demo_LTI_App")
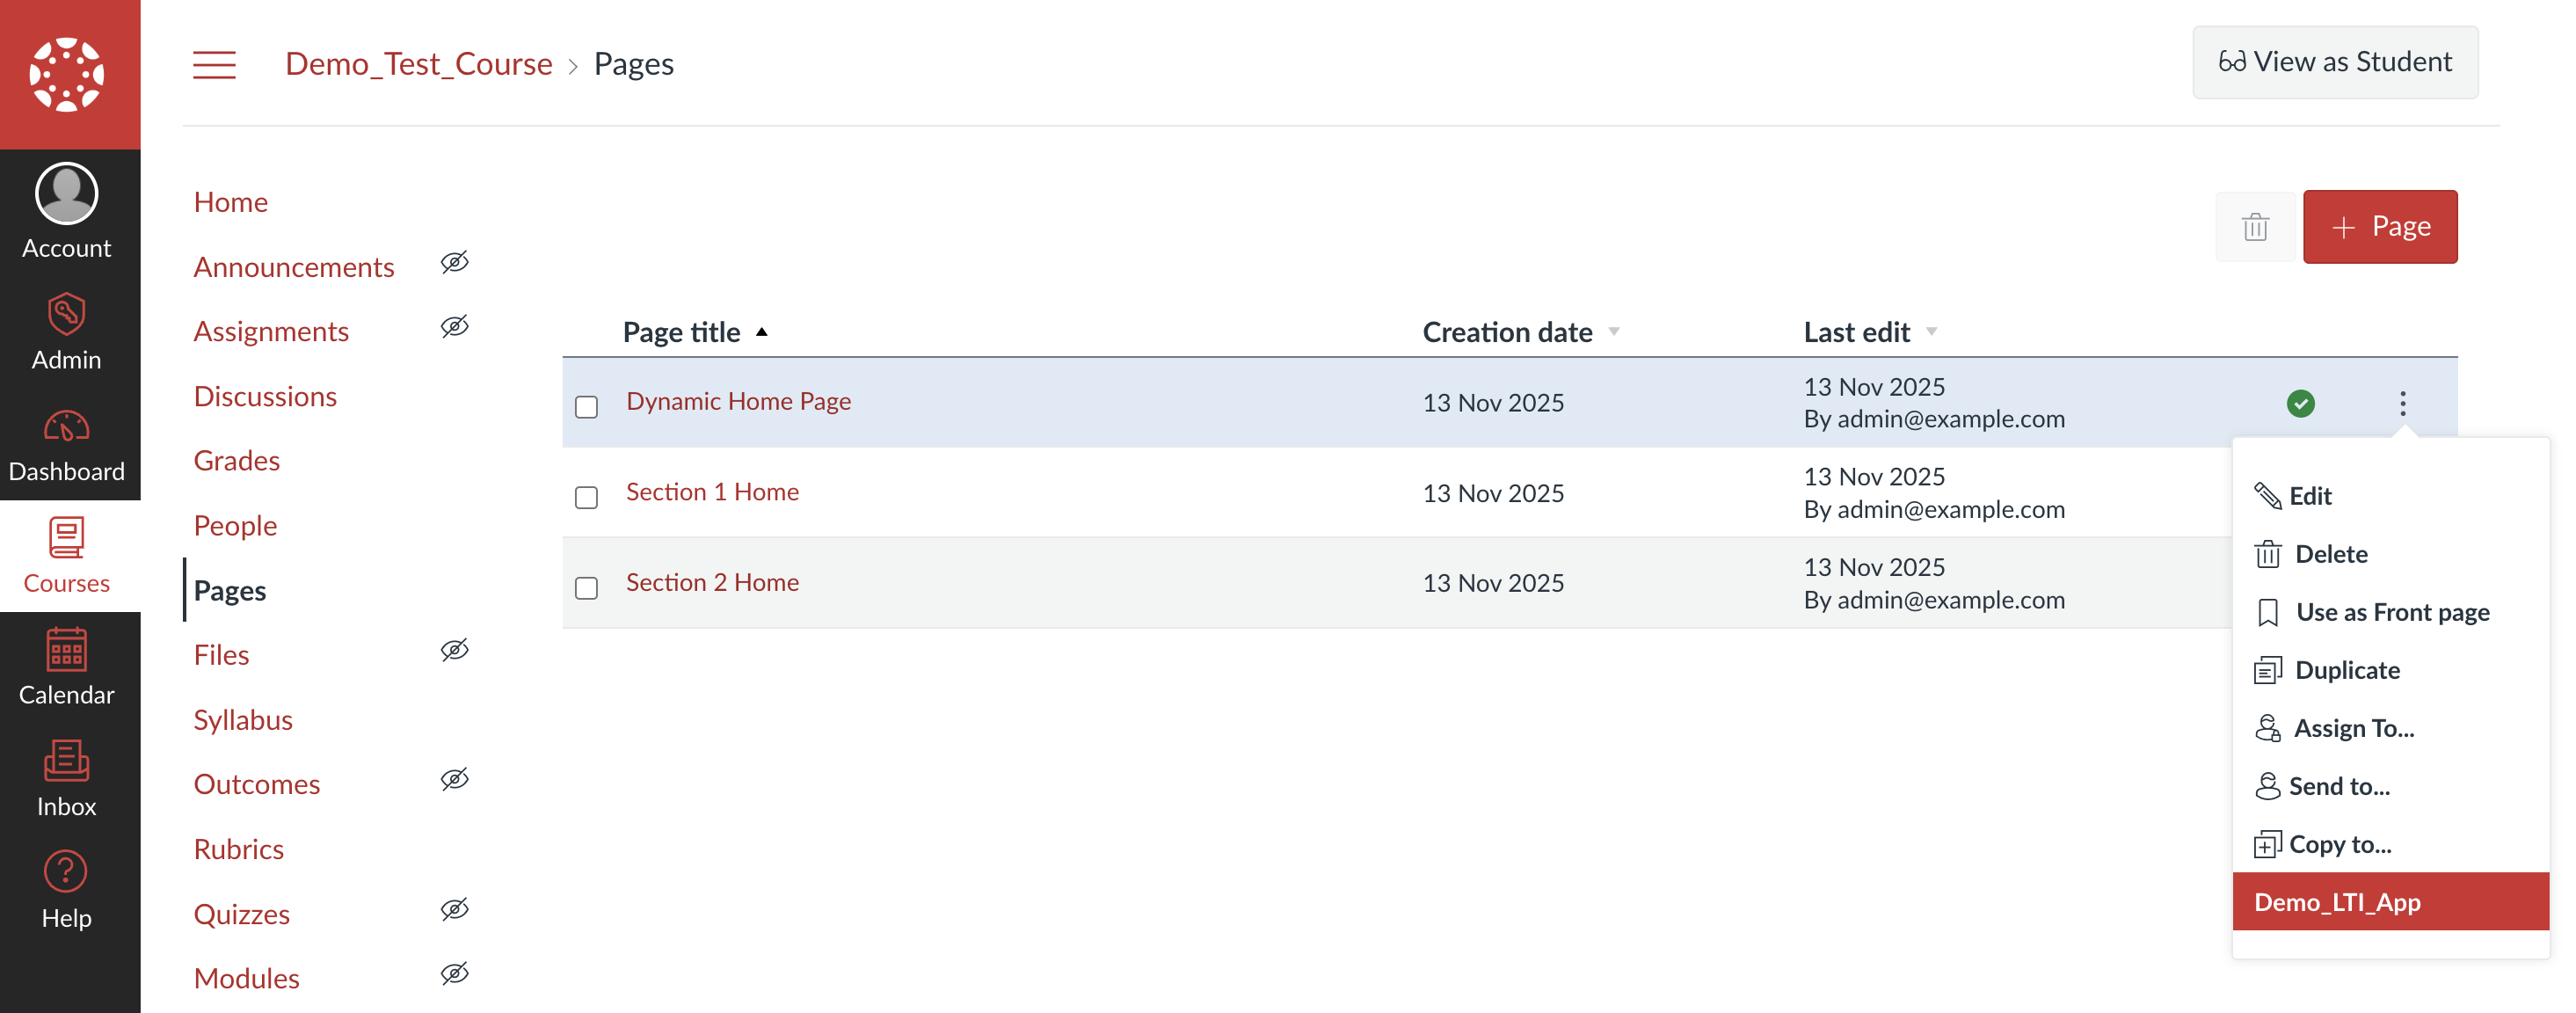
- The LTI tool launches—check the URL in your browser:
http://your-canvas-domain.com/courses/13/external_tools/39?launch_type=wiki_page_menu&pages[]=35
- Copy the URL but remove
&pages[]=35:
http://your-canvas-domain.com/courses/13/external_tools/39?launch_type=wiki_page_menu
Important Note: If you edit your Developer Key configuration and reinstall the LTI app later, this URL will change. You'll need to update the iframe src in the Dynamic Home Page accordingly.
Step 6: Embed the LTI Tool in Dynamic Home Page
- Go to Pages → Dynamic Home Page → Edit
- Click the </> HTML button at the bottom
- Add this iframe:
<iframe
  style="width: 100vw; height: 100vh; border: none;"
  src="http://your-canvas-domain.com/courses/13/external_tools/39?launch_type=wiki_page_menu&display=borderless"
  loading="lazy"
>
</iframe>
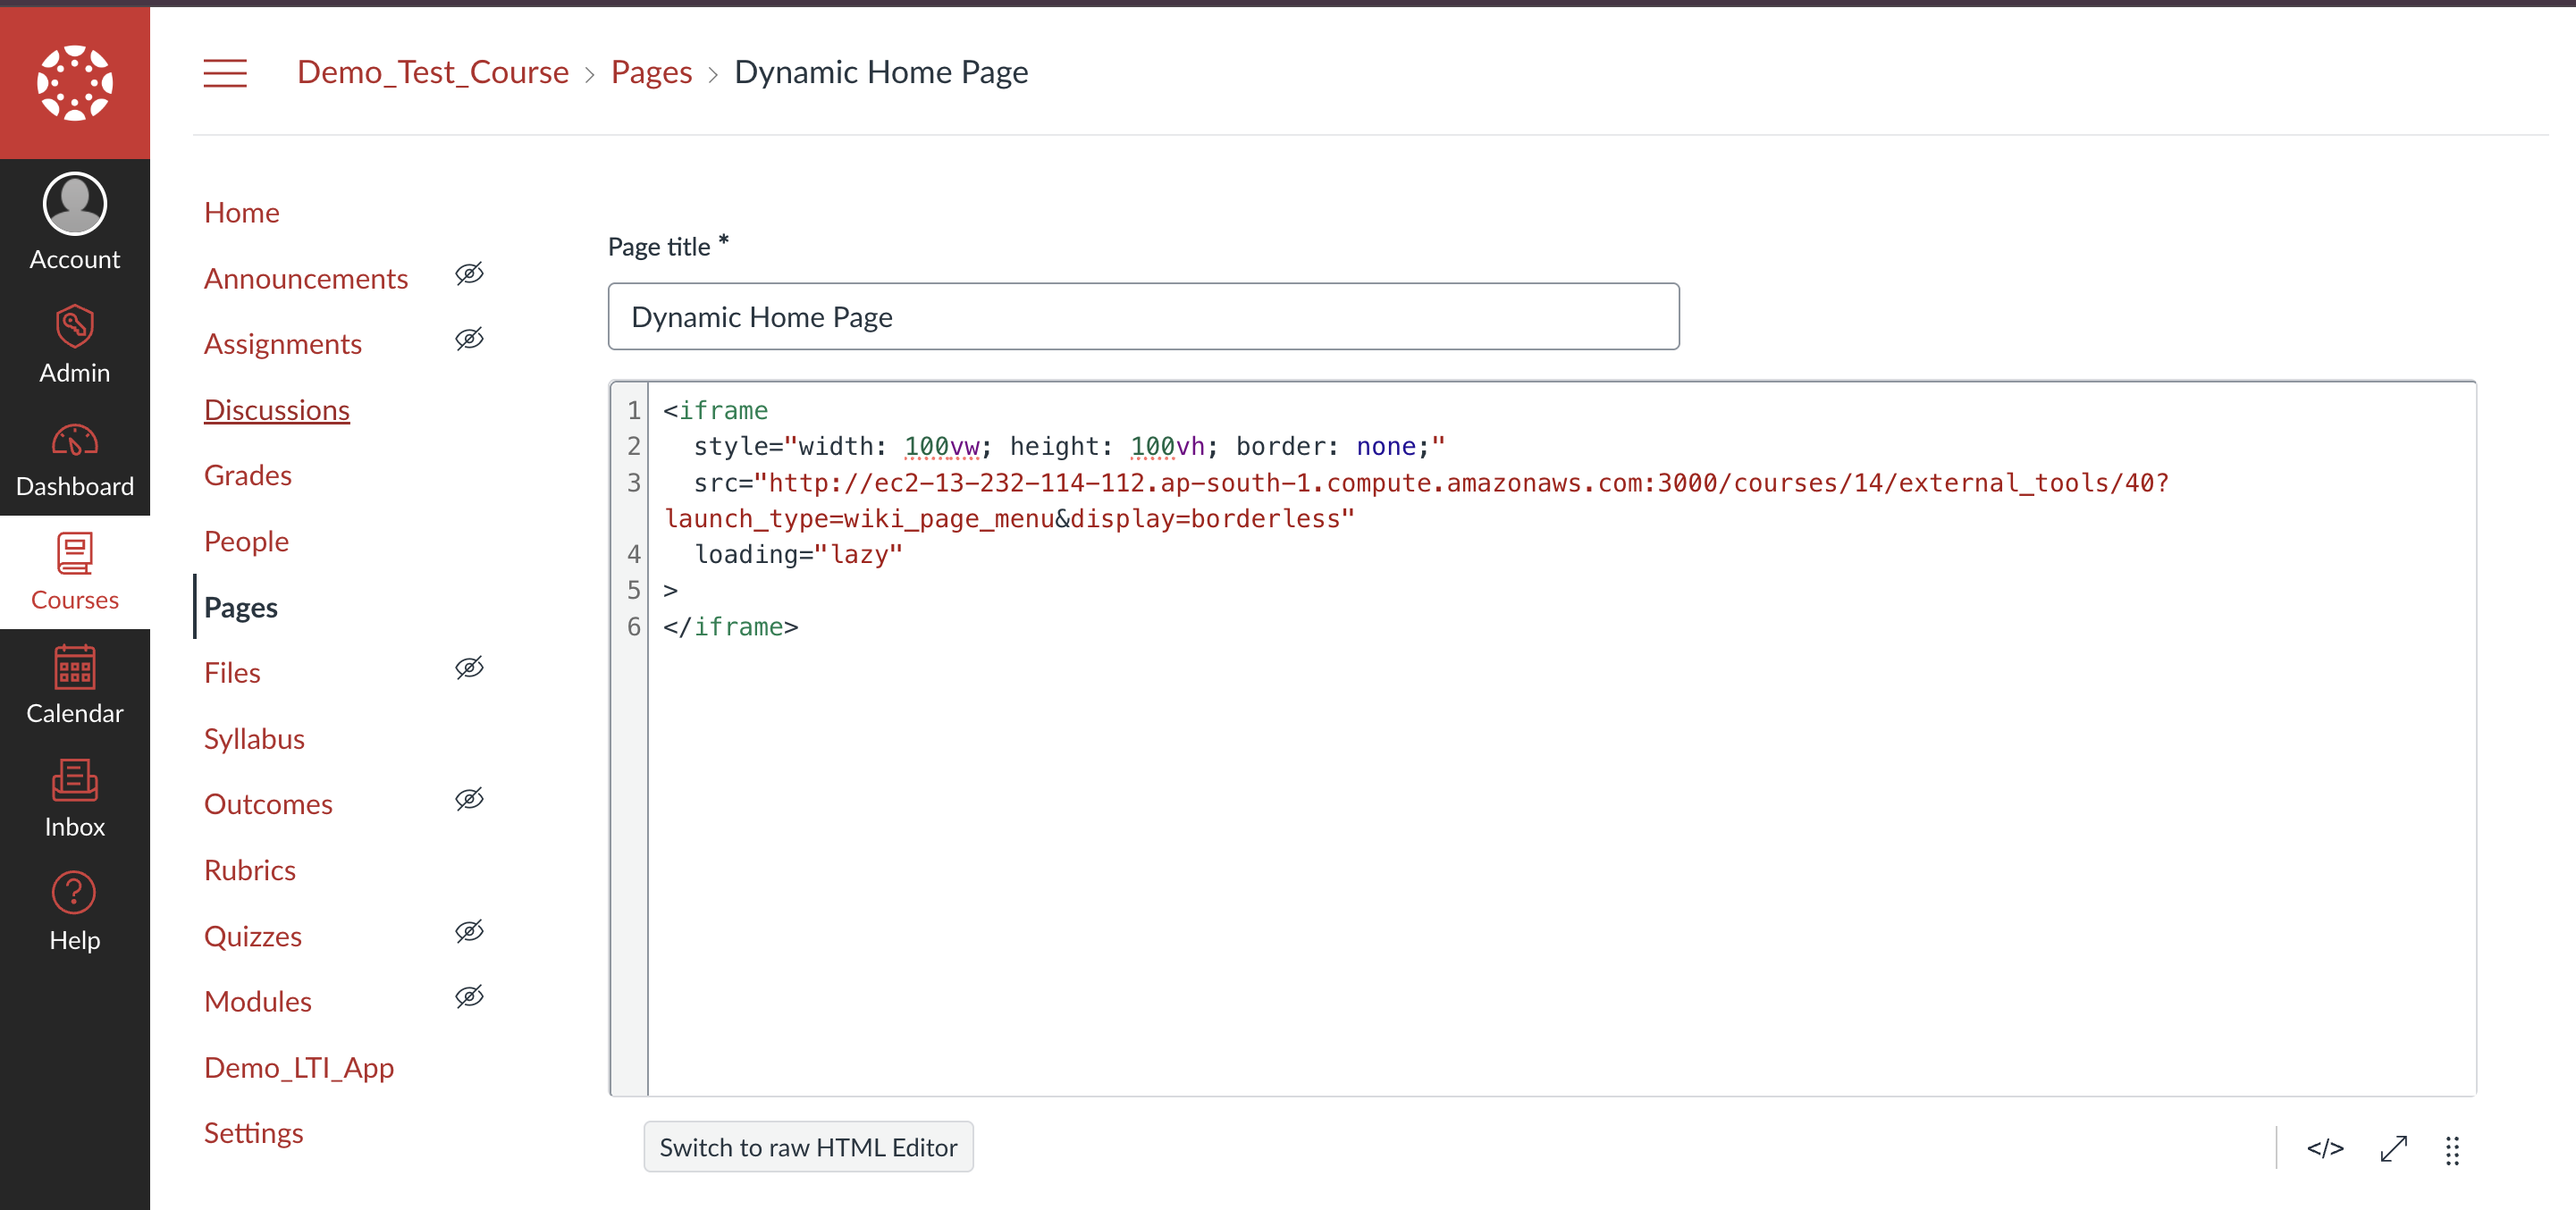
Replace the src with your URL from Step 5, adding &display=borderless at the end for a seamless look.
- Click Save
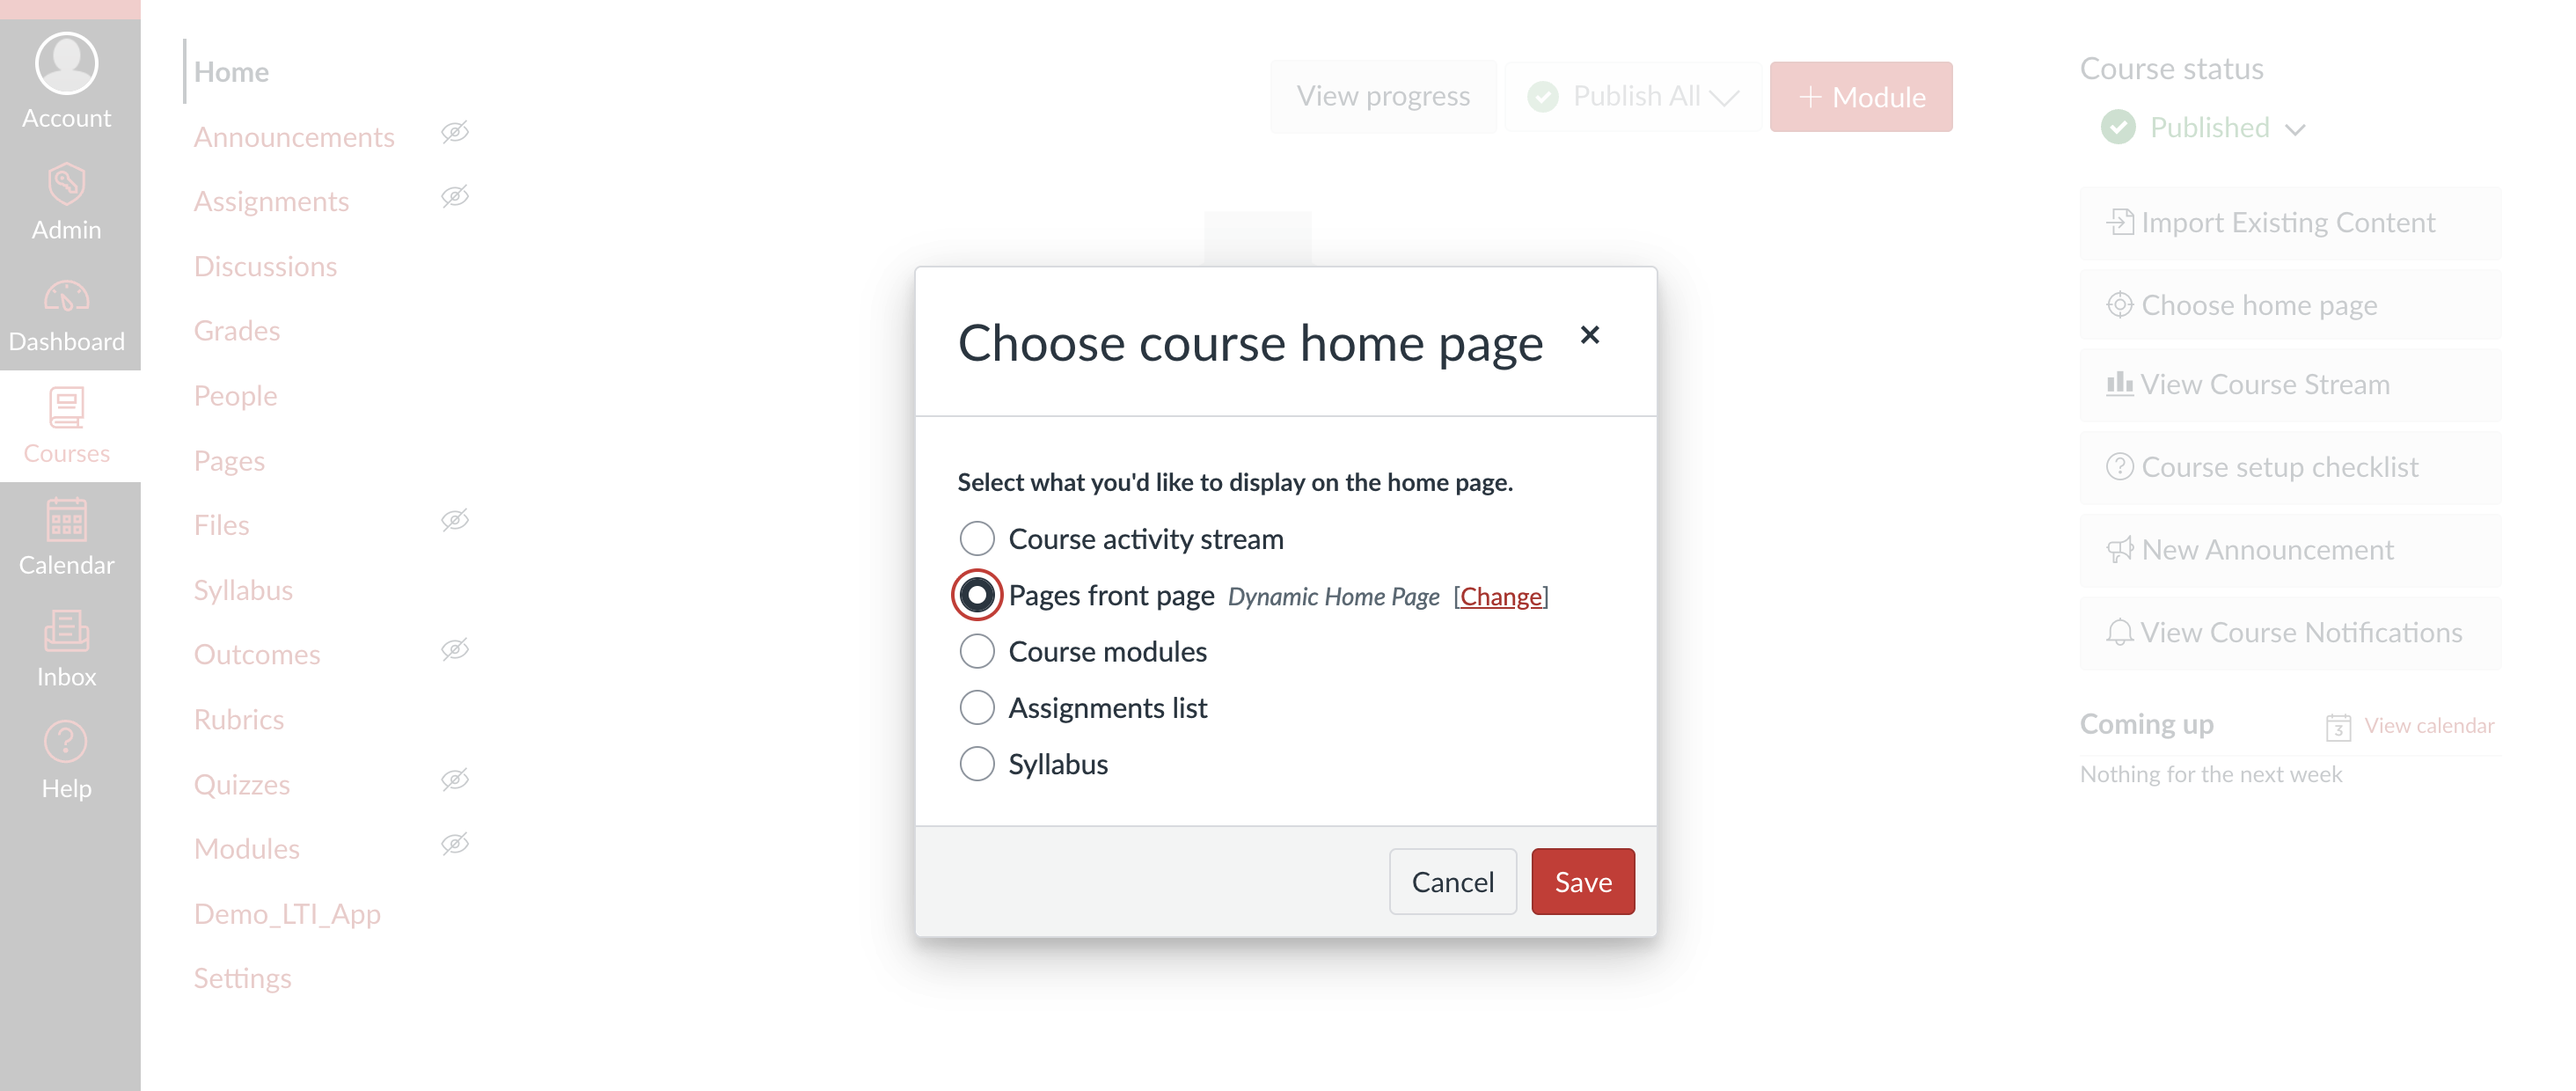
Step 7: Set Dynamic Home Page as Front Page
- In Pages, click the three-dot menu (⋮) next to Dynamic Home Page
- Select Use as Front Page
- Go to Home → Choose Home Page
- Select Pages Front Page → Dynamic Home Page
- Click Save
How It Works: The Technical Implementation
The LTI Launch Flow
When a student visits the home page:
- Canvas loads the Dynamic Home Page with the embedded iframe
- Canvas initiates an LTI launch to your tool's
/lti/loginendpoint - Your tool completes the OIDC flow and validates the JWT at
/lti/launch - Canvas redirects to your Target Link URI:
/lti/homepage - Your tool processes the request and returns section-specific content
For details on the LTI flow, see my Build LTI 1.3 Tool post.
The Dynamic Content Handler
Here's the core logic that makes this work:
// Sample snippet — see the full implementation in the link below

app.get("/lti/homepage", async (req, res) => {
  try {
    // Get the section names - from our custom field:
    // com_instructure_user_section_names=$com.instructure.User.sectionNames
    const sectionNames = JSON.parse(
      customClaim["com_instructure_user_section_names"] || "[]"
    );
    console.log("Student sections:", sectionNames);
    // Use the first section
    const sectionName = sectionNames[0];

    if (!sectionName) {
      console.warn("No section name found in claim.");
      return res.status(400).send("Section name not found.");
    }
    console.log("Course ID:", customClaim.canvas_course_id);

    // Fetch the content for this section's page using Canvas API
    const pageContent = await getPageContent(
      sectionName,
      customClaim.canvas_course_id
    );
    // Return the HTML content
    res.send(pageContent);
  } catch (error) {
    console.error("Error in /lti/homepage route:", error);
    res.status(500).send("Internal server error");
  }
});
Understanding Custom Claims
When Canvas processes the custom fields:
canvas_course_id = $Canvas.course.id;
com_instructure_user_section_names = $com.instructure.User.sectionNames;
It includes them in the LTI JWT like this:
{
  "https://purl.imsglobal.org/spec/lti/claim/custom": {
    "canvas_course_id": "13",
    "com_instructure_user_section_names": "[\"Section 1\"]"
  }
}
The section names come as a JSON string, so we parse it:
const sectionNames = JSON.parse(
  customClaim["com_instructure_user_section_names"] || "[]"
);
// Result: ["Section 1"]
Fetching Page Content with Canvas API
The getPageContent() function uses Canvas API to retrieve the section page:
// Sample snippet — see the full implementation in the link below

async function getPageContent(sectionName, courseId) {
  try {
    const formattedSectionName = sectionName.trim().toLowerCase() + "-home";
    const pageUrl = formattedSectionName.replaceAll(" ", "-");
    console.log("Page url: " + pageUrl);

    const response = await fetch(
      `${process.env.ISSUER}/api/v1/courses/${courseId}/pages/${pageUrl}`,
      {
        headers: {
          Authorization: `Bearer ${process.env.CANVAS_ACCESS_TOKEN}`,
        },
      }
    );
    const data = await response.json();
    return data.body;
  } catch (error) {
    console.error("Error in getPageContent:", error);
    return null;
  }
}
Canvas Page URL Convention: Canvas stores page URLs in a specific format. For example, a page titled "Section 1 Home" is stored with the URL "section-1-home" (lowercase with hyphens). That's why we convert the section name to lowercase and replace spaces with hyphens to match Canvas's URL format.
Canvas API Token: Generate one in Canvas: Account → Settings → Approved Integrations → New Access Token
Testing with Students
Enroll Test Students
- Go to People → + People
- Add a student to Section 1
- Add another student to Section 2
Test the Dynamic Home Page
Log in as each test student and navigate to the course Home page. Students in Section 1 will see the "Section 1 Home" content, while students in Section 2 will see the "Section 2 Home" content—all from the same home page URL!
Important Notes
Naming Convention is Critical
The section pages MUST include "Home" at the end:
<Section Name> HomeSection in Canvas: Section 1
Page name: Section 1 HomeThe word "Home" and proper spacing are essential because Canvas converts page titles to URLs in a specific format (lowercase with hyphens). Your other pages can be named however you like—only the section-specific pages need to follow this convention.
Students in Multiple Sections
If a student belongs to multiple sections, the code uses the first one:
const sectionName = sectionNames[0];
Modify this if you need different logic.
Troubleshooting
Blank page displayed:
- Check iframe
srcURL is correct - Open browser DevTools → Console for errors
- Verify LTI tool is installed and enabled
All students see same content:
- Verify page names exactly match
<Section Name> Home - Check students are in different sections (People tab)
- Review tool logs for detected section:
console.log("Student sections:", sectionNames);
"Page content not found":
- Verify page exists with correct name
- Check Canvas API token is valid
- Review course ID in logs
Conclusion
With this LTI-based approach, you've successfully implemented section-specific home pages in Canvas LMS—something that isn't natively supported. By leveraging LTI 1.3 authentication, custom fields for passing section data, the Canvas API for content retrieval, and iframe embedding for seamless display, you've created a truly dynamic home page experience.
The beauty of this solution is its maintainability. Once set up, instructors can simply edit their section-specific pages through Canvas's familiar page editor, and the dynamic content loading happens automatically behind the scenes. Students in different sections see personalized content without any additional manual configuration.