Why Passwordless (Magic Link) Authentication for Canvas LMS?
Canvas already has solid authentication built in, but in some cases you may want to add passwordless login (often called magic links) on top of it. The main reasons usually come down to simplicity and reducing password fatigue.
Instead of relying on a username and password, users receive a secure one-time link (or token) in their email. Clicking it signs them in directly with no extra credentials to remember. This can be useful when integrating external tools, plugins, or LTI apps with Canvas since users do not need to manage another login.
Under the hood, these flows often use OpenID Connect (OIDC), which allows Canvas to trust the login and securely pass along verified user information.
- Learn more about OpenID Connect
- Read about Magic Link authentication
Setting Up Your OpenID Connect Provider
Before we configure Canvas LMS, we need an authentication service that can handle the magic link flow. For this guide, we'll build a lightweight OpenID Connect provider using Node.js that sends magic links via email.
Note: The code snippets shown below are simplified examples to give you an idea of the implementation. For the complete, working code, visit our full implementation here.
The TOOL_URL environment variable should be set to the public URL where your Node.js application is hosted - this is what Canvas will use to communicate with your authentication service.
Magic Link Flow Implementation
The magic link process works in three main steps:
- Email Collection: User enters their email address
- Secure Link Generation: System creates a time-limited token and emails it
- Authentication: User clicks link and gets logged in
Testing the Magic Link Flow
Before diving into Canvas configuration, let's understand exactly what happens during the authentication process and each endpoint involved. This will help you better understand what you're configuring in Canvas later.
The Complete OAuth Dance: Step by Step
When a user attempts to log into Canvas, here's the detailed flow that occurs:
1. Initial Canvas Redirect
Canvas redirects the user to your authorization endpoint (/oauth/authorize). This is where the OAuth flow officially begins.
// Simplified example for illustration, full working code is linked above

app.get("/oauth/authorize", (req, res) => {
  const { client_id, redirect_uri, response_type, scope, state, nonce } =
    req.query;

  // Validate the request from Canvas
  if (!client_id || response_type !== "code") {
    return res.status(400).json({ error: "invalid_request" });
  }

  // Store the OAuth request for later use
  req.session.authRequest = { client_id, redirect_uri, scope, state, nonce };

  // Check if user is already authenticated
  if (!req.session.user) {
    return res.redirect("/login?continue=oauth");
  }
});
What's happening: Canvas sends the user to your service with OAuth parameters. Your service checks if the user is already logged in to your system.
2. Magic Link Login Process
If the user isn't authenticated, they're redirected to your login page where they enter their email:
// Simplified example for illustration, full working code is linked above

app.post("/send-link", async (req, res) => {
  const { email } = req.body;
  const token = uuidv4();

  // Store the magic link token with expiration
  req.session.magicLink = {
    email,
    token,
    expiresAt: Date.now() + 15 * 60 * 1000,
  };

  // Send the magic link via email
  const magicUrl = `${process.env.TOOL_URL}/magic-login?token=${token}`;
  await sendMagicLinkEmail(email, magicUrl);
});
What's happening: User enters email, system generates a secure token, stores it temporarily, and emails the magic link.
Note: For simplicity this demo stores the magic token in the session. In production, store tokens in a database (or Redis), make them single-use, and set an expiry so links work across browsers/devices.
3. Magic Link Validation
When the user clicks the magic link, your system validates the token and creates their session:
// Simplified example for illustration, full working code is linked above

app.get("/magic-login", async (req, res) => {
  const { token } = req.query;
  const magic = req.session.magicLink;

  // Validate the magic link token
  if (!magic || magic.token !== token || Date.now() > magic.expiresAt) {
    return res.status(400).send("Invalid or expired link");
  }

  // Create authenticated user session
  req.session.user = {
    email: magic.email,
    name: extractNameFromEmail(magic.email),
    loginTime: new Date().toISOString(),
  };
});
What's happening: Your system verifies the magic link is valid and hasn't expired, then creates an authenticated session for the user.
4. Consent Screen Display
Once authenticated, the user sees a consent screen asking for permission to share their information with Canvas:
// Simplified example for illustration, full working code is linked above

function showConsentScreen(req, res) {
  const user = req.session.user;
  const authRequest = req.session.authRequest;

  // Display what Canvas is requesting access to
  const requestedScopes = authRequest.scope.split(" ");
  // Show user what permissions Canvas wants
  // (HTML template with consent form)
}
What's happening: Like Google or other OAuth providers, your system shows what data Canvas wants to access and asks for user consent.
5. Authorization Code Generation
After the user consents, your system generates an authorization code and redirects back to Canvas:
// Simplified example for illustration, full working code is linked above

app.post("/oauth/consent", async (req, res) => {
  const code = uuidv4();
  const user = req.session.user;

  // Store authorization code temporarily
  authorizationCodes.set(code, {
    user: userData,
    client_id: authRequest.client_id,
    scope: authRequest.scope,
    expiresAt: Date.now() + 10 * 60 * 1000, // 10 minutes
  });

  // Redirect back to Canvas with the authorization code
  const redirectUrl = new URL(authRequest.redirect_uri);
  redirectUrl.searchParams.append("code", code);
  res.redirect(redirectUrl.toString());
});
What's happening: Your system creates a temporary authorization code and sends the user back to Canvas with this code.
6. Token Exchange
Canvas then makes a server-to-server request to exchange the authorization code for an access token and ID token:
// Simplified example for illustration, full working code is linked above

app.post("/oauth/token", async (req, res) => {
  const { grant_type, code, client_id, client_secret } = req.body;

  // Validate the authorization code
  const authData = authorizationCodes.get(code);
  if (!authData || authData.expiresAt < Date.now()) {
    return res.status(400).json({ error: "invalid_grant" });
  }

  // Generate access token and ID token
  const accessToken = uuidv4();
  const idToken = await createSignedJWT(authData.user);

  res.json({
    access_token: accessToken,
    id_token: idToken,
    token_type: "Bearer",
    expires_in: 3600,
  });
});
What's happening: Canvas validates its identity and exchanges the temporary code for longer-lived tokens containing user information.
7. User Information Retrieval
Canvas may optionally use the access token to get additional user information from your userinfo endpoint:
// Simplified example for illustration, full working code is linked above

app.get("/oauth/userinfo", (req, res) => {
  const accessToken = extractTokenFromHeader(req.headers.authorization);
  const tokenData = accessTokens.get(accessToken);

  res.json({
    sub: user.id,
    name: user.name,
    email: user.email,
    email_verified: true,
  });
});
What's happening: Canvas may request additional user details if needed, though in most cases the ID token from step 6 contains sufficient information for user creation and login.
User Management and Canvas Integration
This setup works correctly when the email address doesn't exist in Canvas LMS. To simplify our example, we'll focus on new user creation. However, if you need to handle existing users, you should check if the email already exists in Canvas and add an OpenID Connect login method to that existing user instead of creating a duplicate. You can see the complete logic for this in our full code implementation.
When someone logs in with a magic link and doesn't have a Canvas account, our service automatically creates one:
// Simplified example for illustration, full working code is linked above

async function createCanvasUser(email) {
  const payload = {
    user: {
      name: extractNameFromEmail(email),
      email: email,
    },
    pseudonym: {
      unique_id: email,
      authentication_provider_id: 4, // Your provider ID
    },
  };

  await fetch(`${process.env.ISSUER}/api/v1/accounts/1/users`, {
    method: "POST",
    headers: {
      Authorization: `Bearer ${process.env.CANVAS_ACCESS_TOKEN}`,
      "Content-Type": "application/json",
    },
    body: JSON.stringify(payload),
  });
}
Important: We use authentication_provider_id: 4 in this example, but you need to find your actual provider ID.
Use the Canvas API endpoint to check this: GET /api/v1/accounts/:account_id/authentication_providers (API Documentation). This will return something like "id": 4, "auth_type": "openid_connect".
Note: This API will only display the OpenID Connect provider after you have configured OpenID Connect login in Canvas LMS
Pro Tip: You can test all Canvas APIs by visiting
<your-canvas-domain>/doc/api/live. To get an access token for testing, log in as an admin, go to Account → Profile → Settings, and click "New Access Token".
Note: This is a simplified code snippet. See the complete implementation for full user verification logic.
Configuring Canvas LMS
Now that you understand the OAuth flow, let's configure Canvas to use your magic link authentication service.
Step 1: Add the Authentication Provider
Navigate to Admin > Authentication in your Canvas instance. In the top right corner, select "OpenID Connect" as the authentication provider type. This will show you the OpenID Connect configuration settings.
Here you'll configure the integration with these key fields:
- Client ID: In this example we'll use
10001to keep it simple, but make sure to use a unique identifier in production - Client Secret: Generate a secure secret (keep this private!)
- Discovery URL: Point this to your service's discovery endpoint:
https://your-domain.com/.well-known/openid-configuration

Once you've entered the Discovery URL, Client ID, and Client Secret, click Save. Make sure your Node.js server is running - Canvas will automatically fetch the OpenID configuration and populate most of the remaining fields based on what your discovery endpoint returns.
Step 2: Configure Scopes and Attributes
After the discovery URL auto-populates the configuration, you'll need to set:
Scopes: openid profile email
openid: Required for OIDC authenticationprofile: Provides user's display nameemail: Gives access to user's email address
Login Attribute: Set to email - this tells Canvas which field to use as the unique user identifier.
Just-in-Time Provisioning: Uncheck this option. We're avoiding just-in-time provisioning because it might create duplicate users if someone with the same email already exists in Canvas with a different login method. Instead, we'll handle user creation ourselves using the Canvas API, which gives us better control over the process.
Federated Attributes: These map data from your authentication service to Canvas user fields:
email→email: Maps the email addressname→display_name: Maps the user's display namename→given_name: Maps to first name fieldname→sortable_name: Used for sorting in Canvas listsadmin_roles→ Custom field for administrative permissions
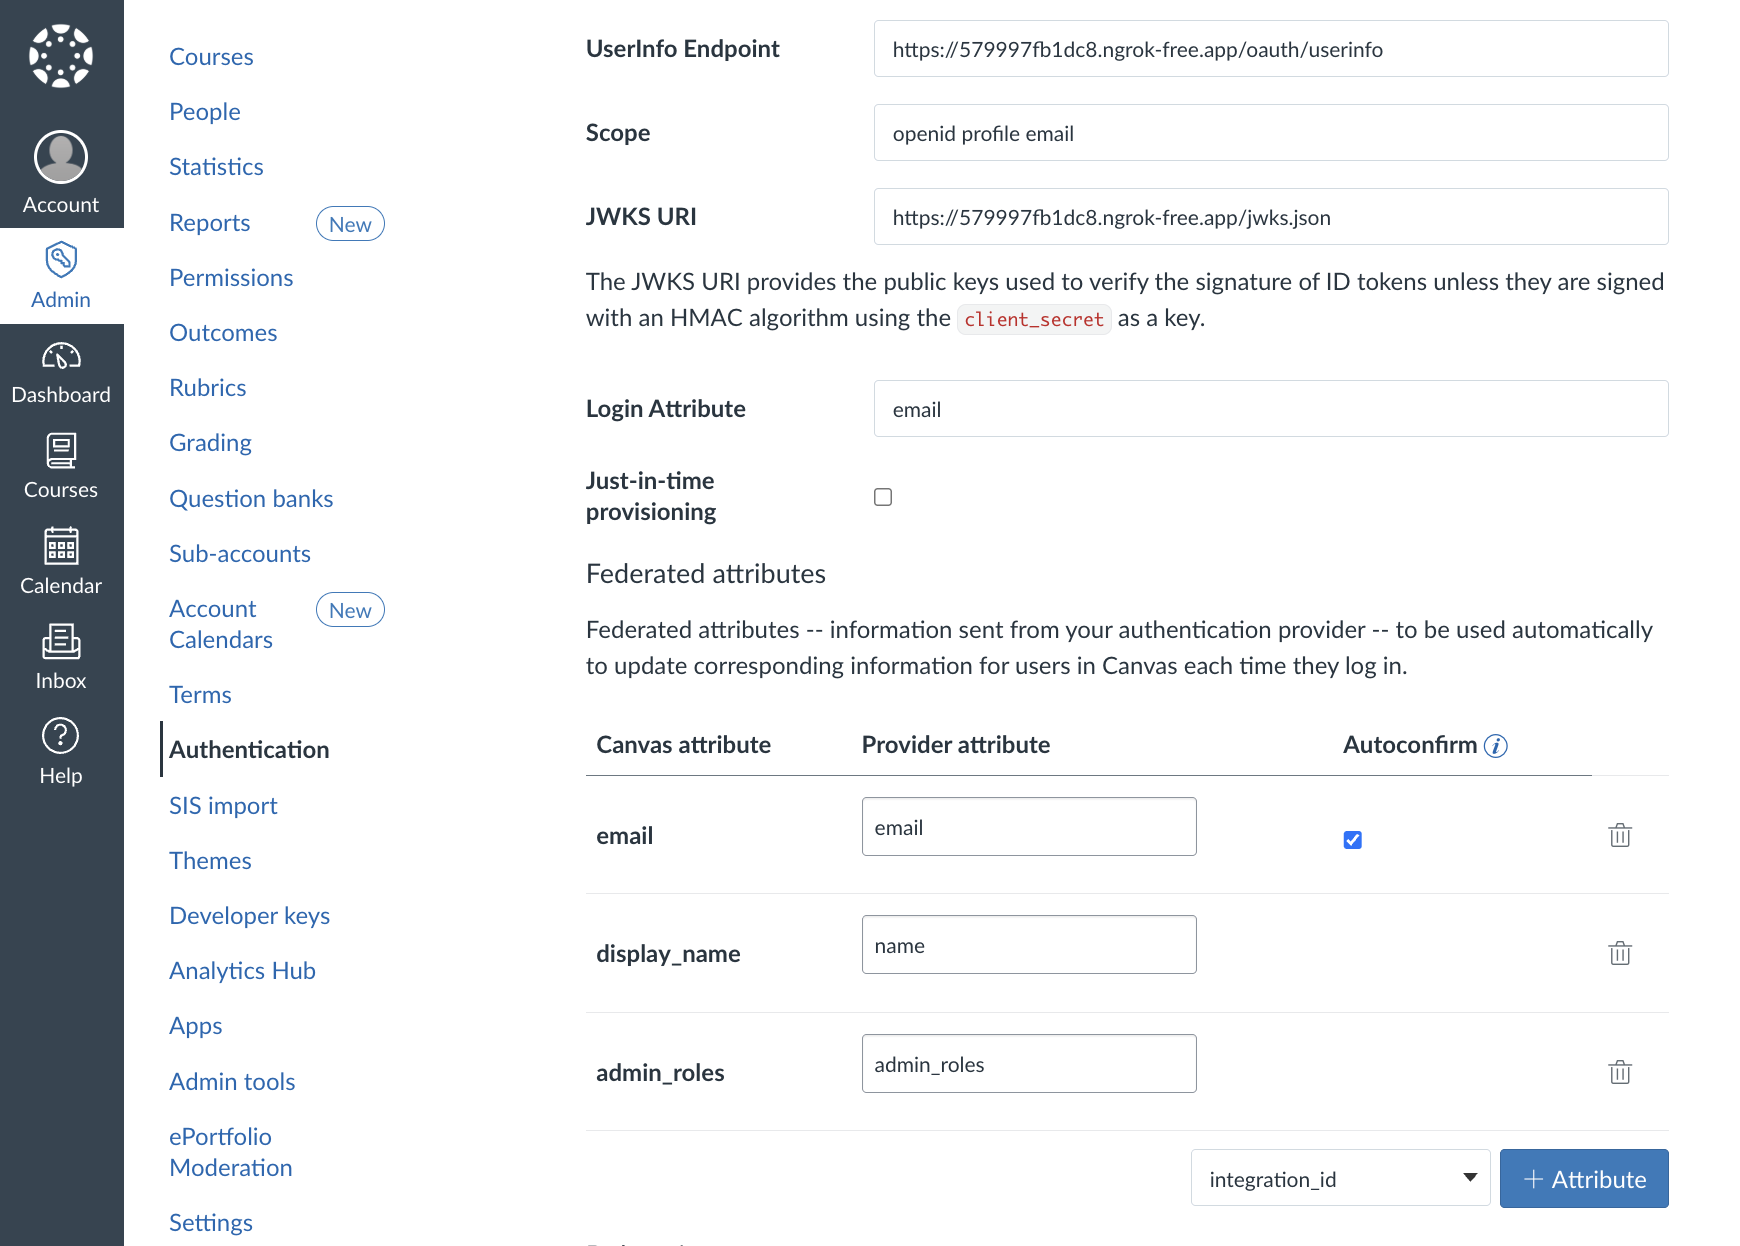
These mappings ensure that when a user logs in through your service, their Canvas profile gets updated with the correct information automatically.
Step 3: Save Configuration
Just for now, click Save to apply your configuration, but don't logout yet. Canvas will validate the settings and store them.
Step 4: Set Authentication Priority
Change the Position to 1 to make OpenID Connect the default login method. This means when users visit Canvas, they'll see your magic link login instead of the traditional username/password form.
Users can still use other Canvas login methods by visiting /login/canvas to access the previous login interface. Also, change the Canvas default provider setting position to 2 and click Save.
Final Testing
Now you're ready to test the complete flow!
- Logout from Canvas LMS - Make sure you're completely signed out
- Start your Node.js server - Ensure it's running and accessible at your configured URL
- Visit Canvas - Go to your Canvas login page by entering your Canvas domain without
/login/canvasto use the OpenID Connect login flow - Test the magic link flow - You should be redirected to your authentication service instead of seeing the standard Canvas login
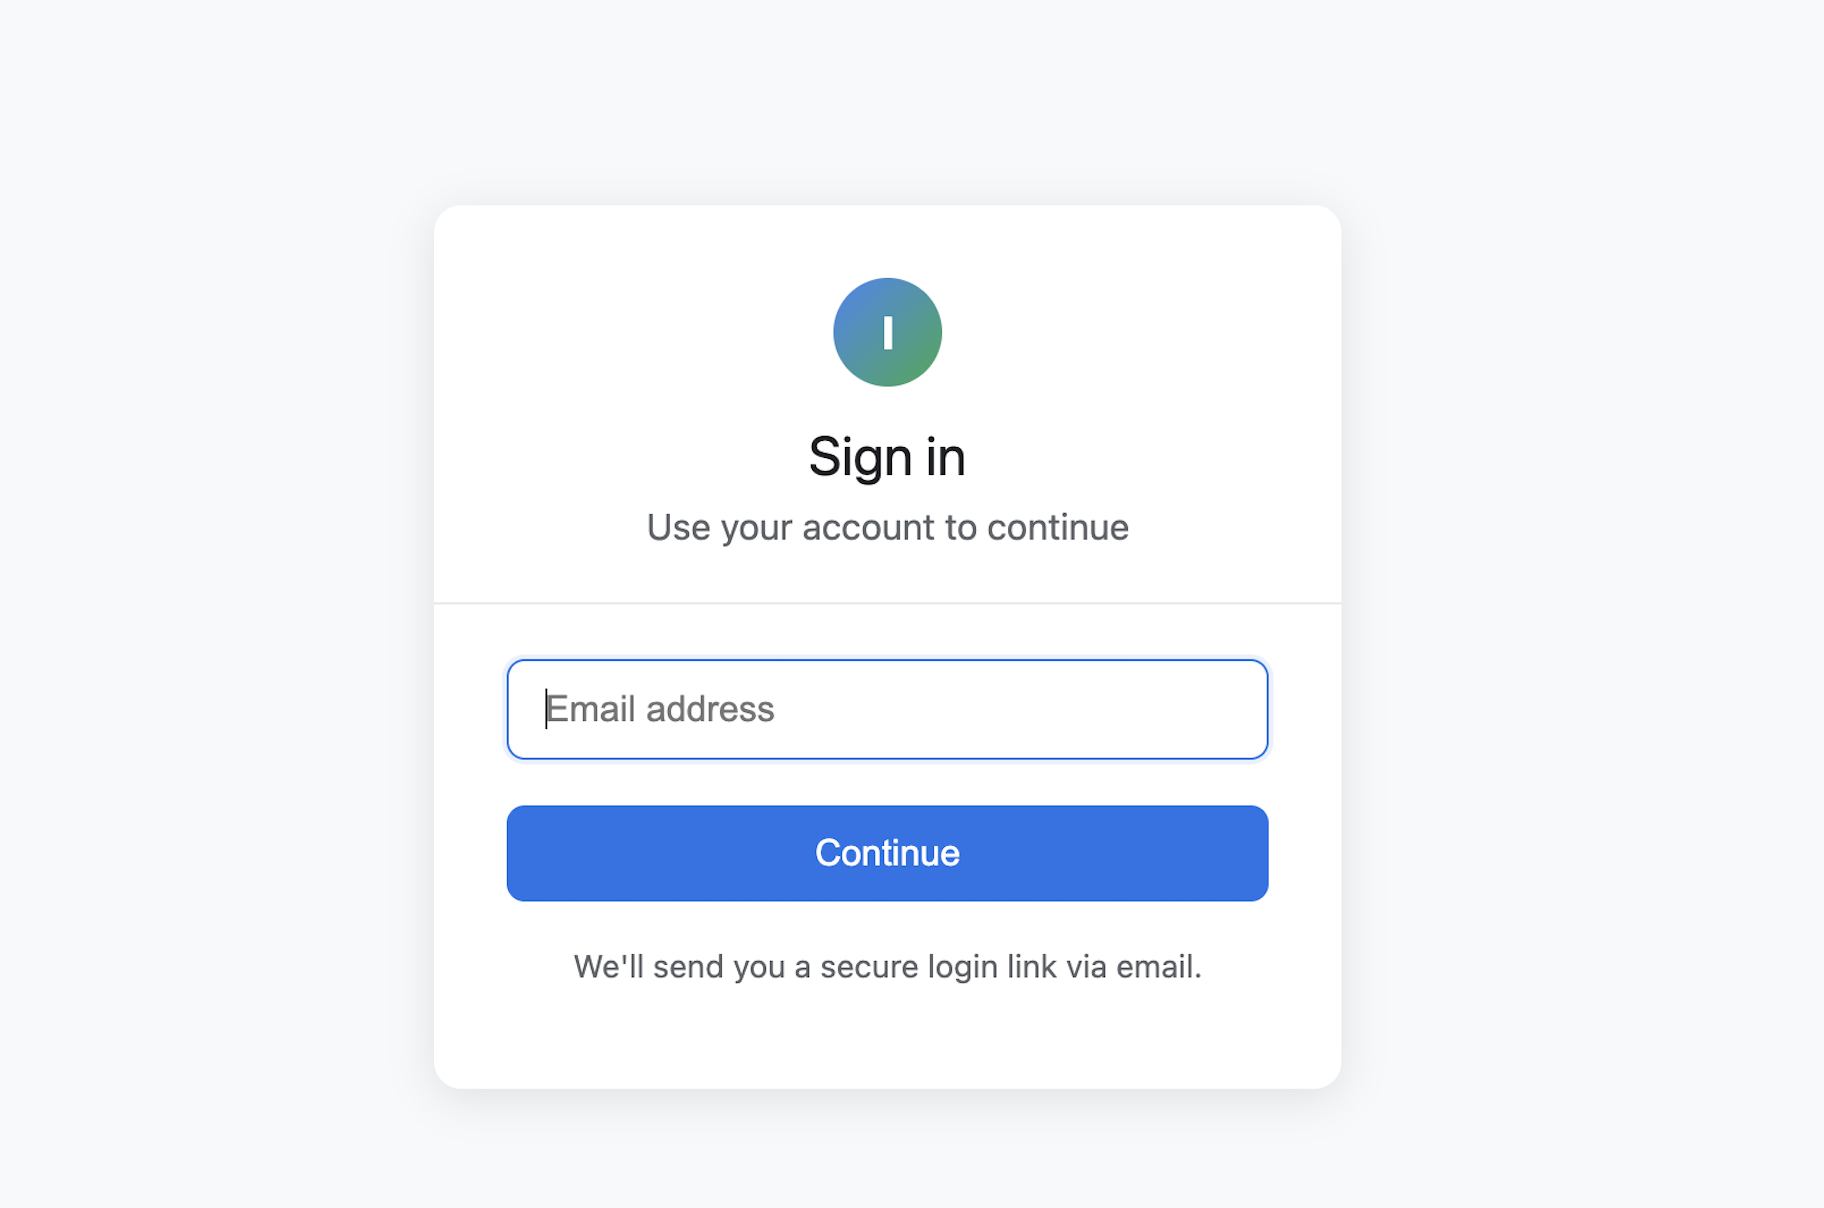
The user experience should be:
- Canvas Redirect: User gets redirected to your clean email login form
- Email Entry: They enter their email and click "Continue"
- Magic Link Delivery: They receive an email with a secure login link
- Consent Screen: After clicking the link, they see what Canvas is requesting
- Automatic Canvas Access: Upon consent, they're logged into Canvas seamlessly
Implementation Notes
For complete functionality, please refer to our full code implementation linked at the top of this guide. The complete codebase includes:
- Comprehensive login/logout handling with proper session management
- Edge case handling for existing users and duplicate accounts
- Admin login capabilities through magic links with role-based permissions
Email Service: This example uses SendGrid API for sending emails, but you can integrate any email service provider. Note that magic link emails may arrive in spam folder.
Troubleshooting Common Issues
Discovery URL Not Loading: Double-check that your service is accessible and returns proper JSON at /.well-known/openid-configuration
Users Not Getting Created: Verify your Canvas API token has the right permissions for user management
Login Loops: Make sure your redirect URIs in the Canvas configuration match exactly what your service expects
Email Delivery Issues: Check your email service configuration, ensure SendGrid API keys are correct, and verify SPF/DKIM records
Token Validation Errors: Ensure your JWT signing keys are properly generated and the kid (key ID) matches between your JWKS endpoint and token headers
Authentication Provider ID Issues: Use the Canvas API to get the correct authentication_provider_id for your OpenID Connect provider rather than hardcoding values