Step 1: Log In to Canvas LMS and Access Developer Keys
Before we start connecting our LTI 1.3 tool, make sure PostgreSQL and Redis are running on your machine (Canvas won’t work without them).
Once confirmed, follow these steps:
- Log in to your local Canvas LMS instance as an Admin.
- Go to Admin → select the Account where you’ll install the LTI 1.3 tool.
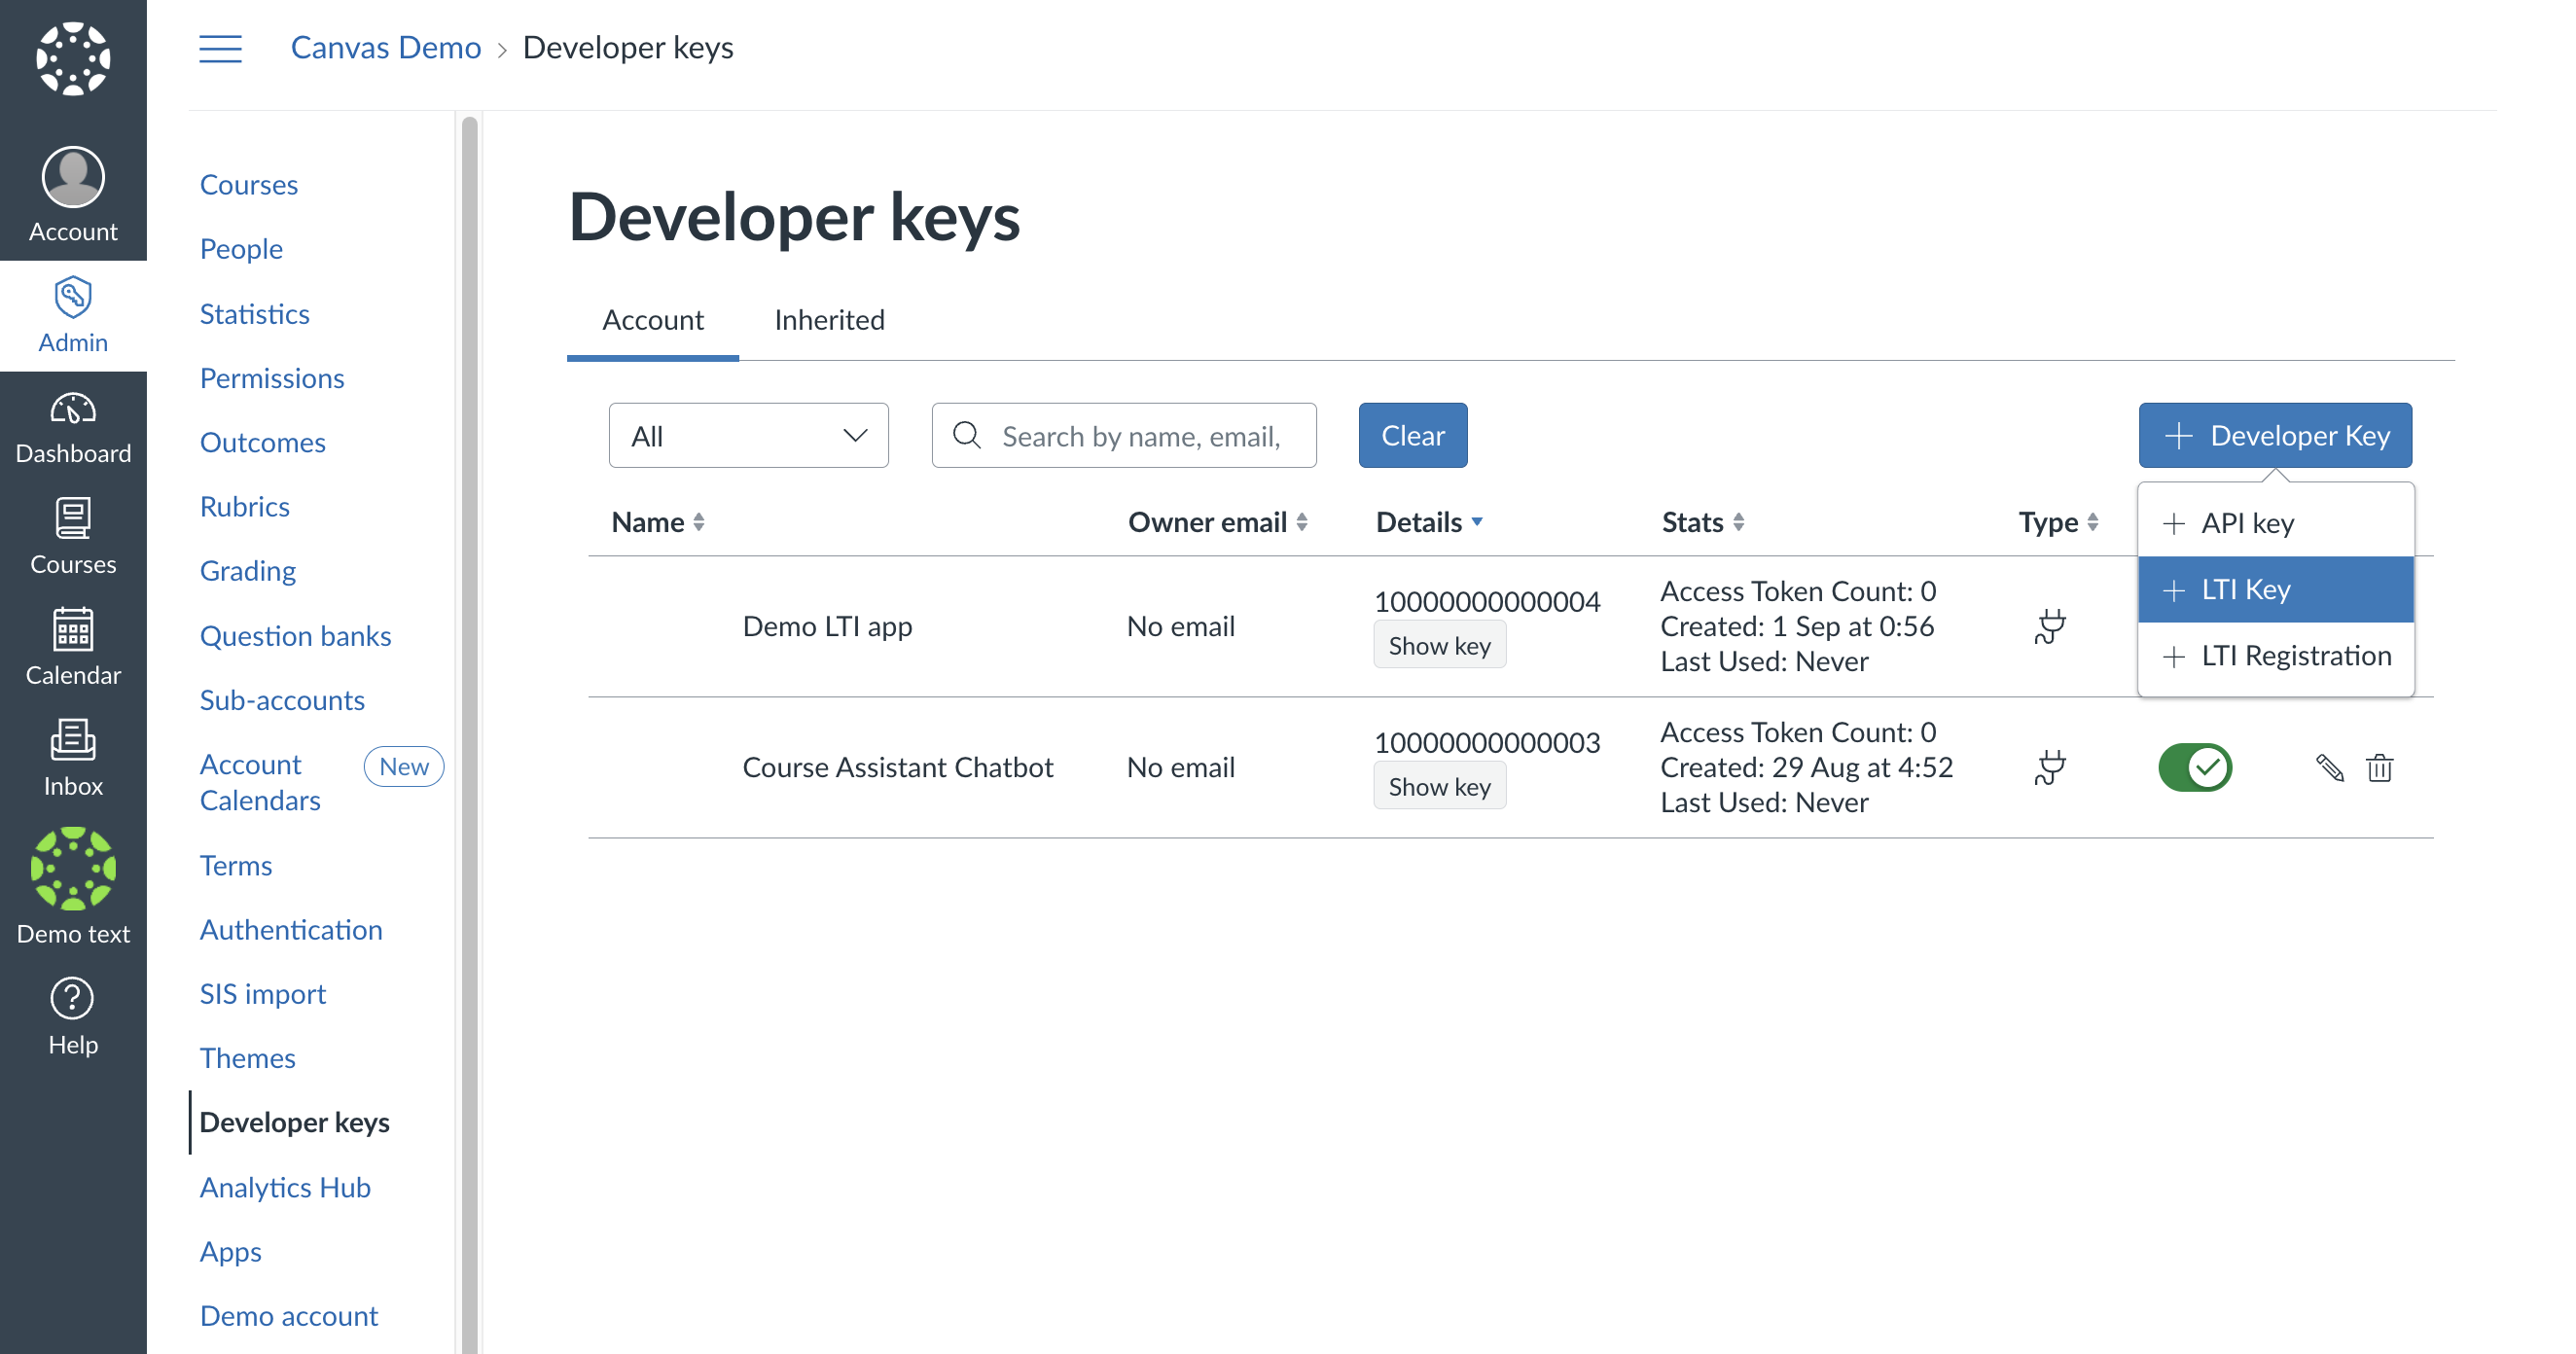
- Scroll down and click Developer Keys.
- Click + Developer Key in the top right corner.
- From the dropdown, choose LTI Key.
Why We Need a Developer Key
- A Developer Key lets Canvas recognize and trust our LTI 1.3 tool.
- It stores details like Tool Name, Redirect URLs, JWKS URL, and Client ID, enabling Canvas to securely launch the tool, authenticate users, and share course/user data — like a secure handshake between Canvas and our app.
Step 2: Configure the LTI 1.3 Tool in Canvas
It’s time to configure our LTI 1.3 tool by adding the required URLs and settings.
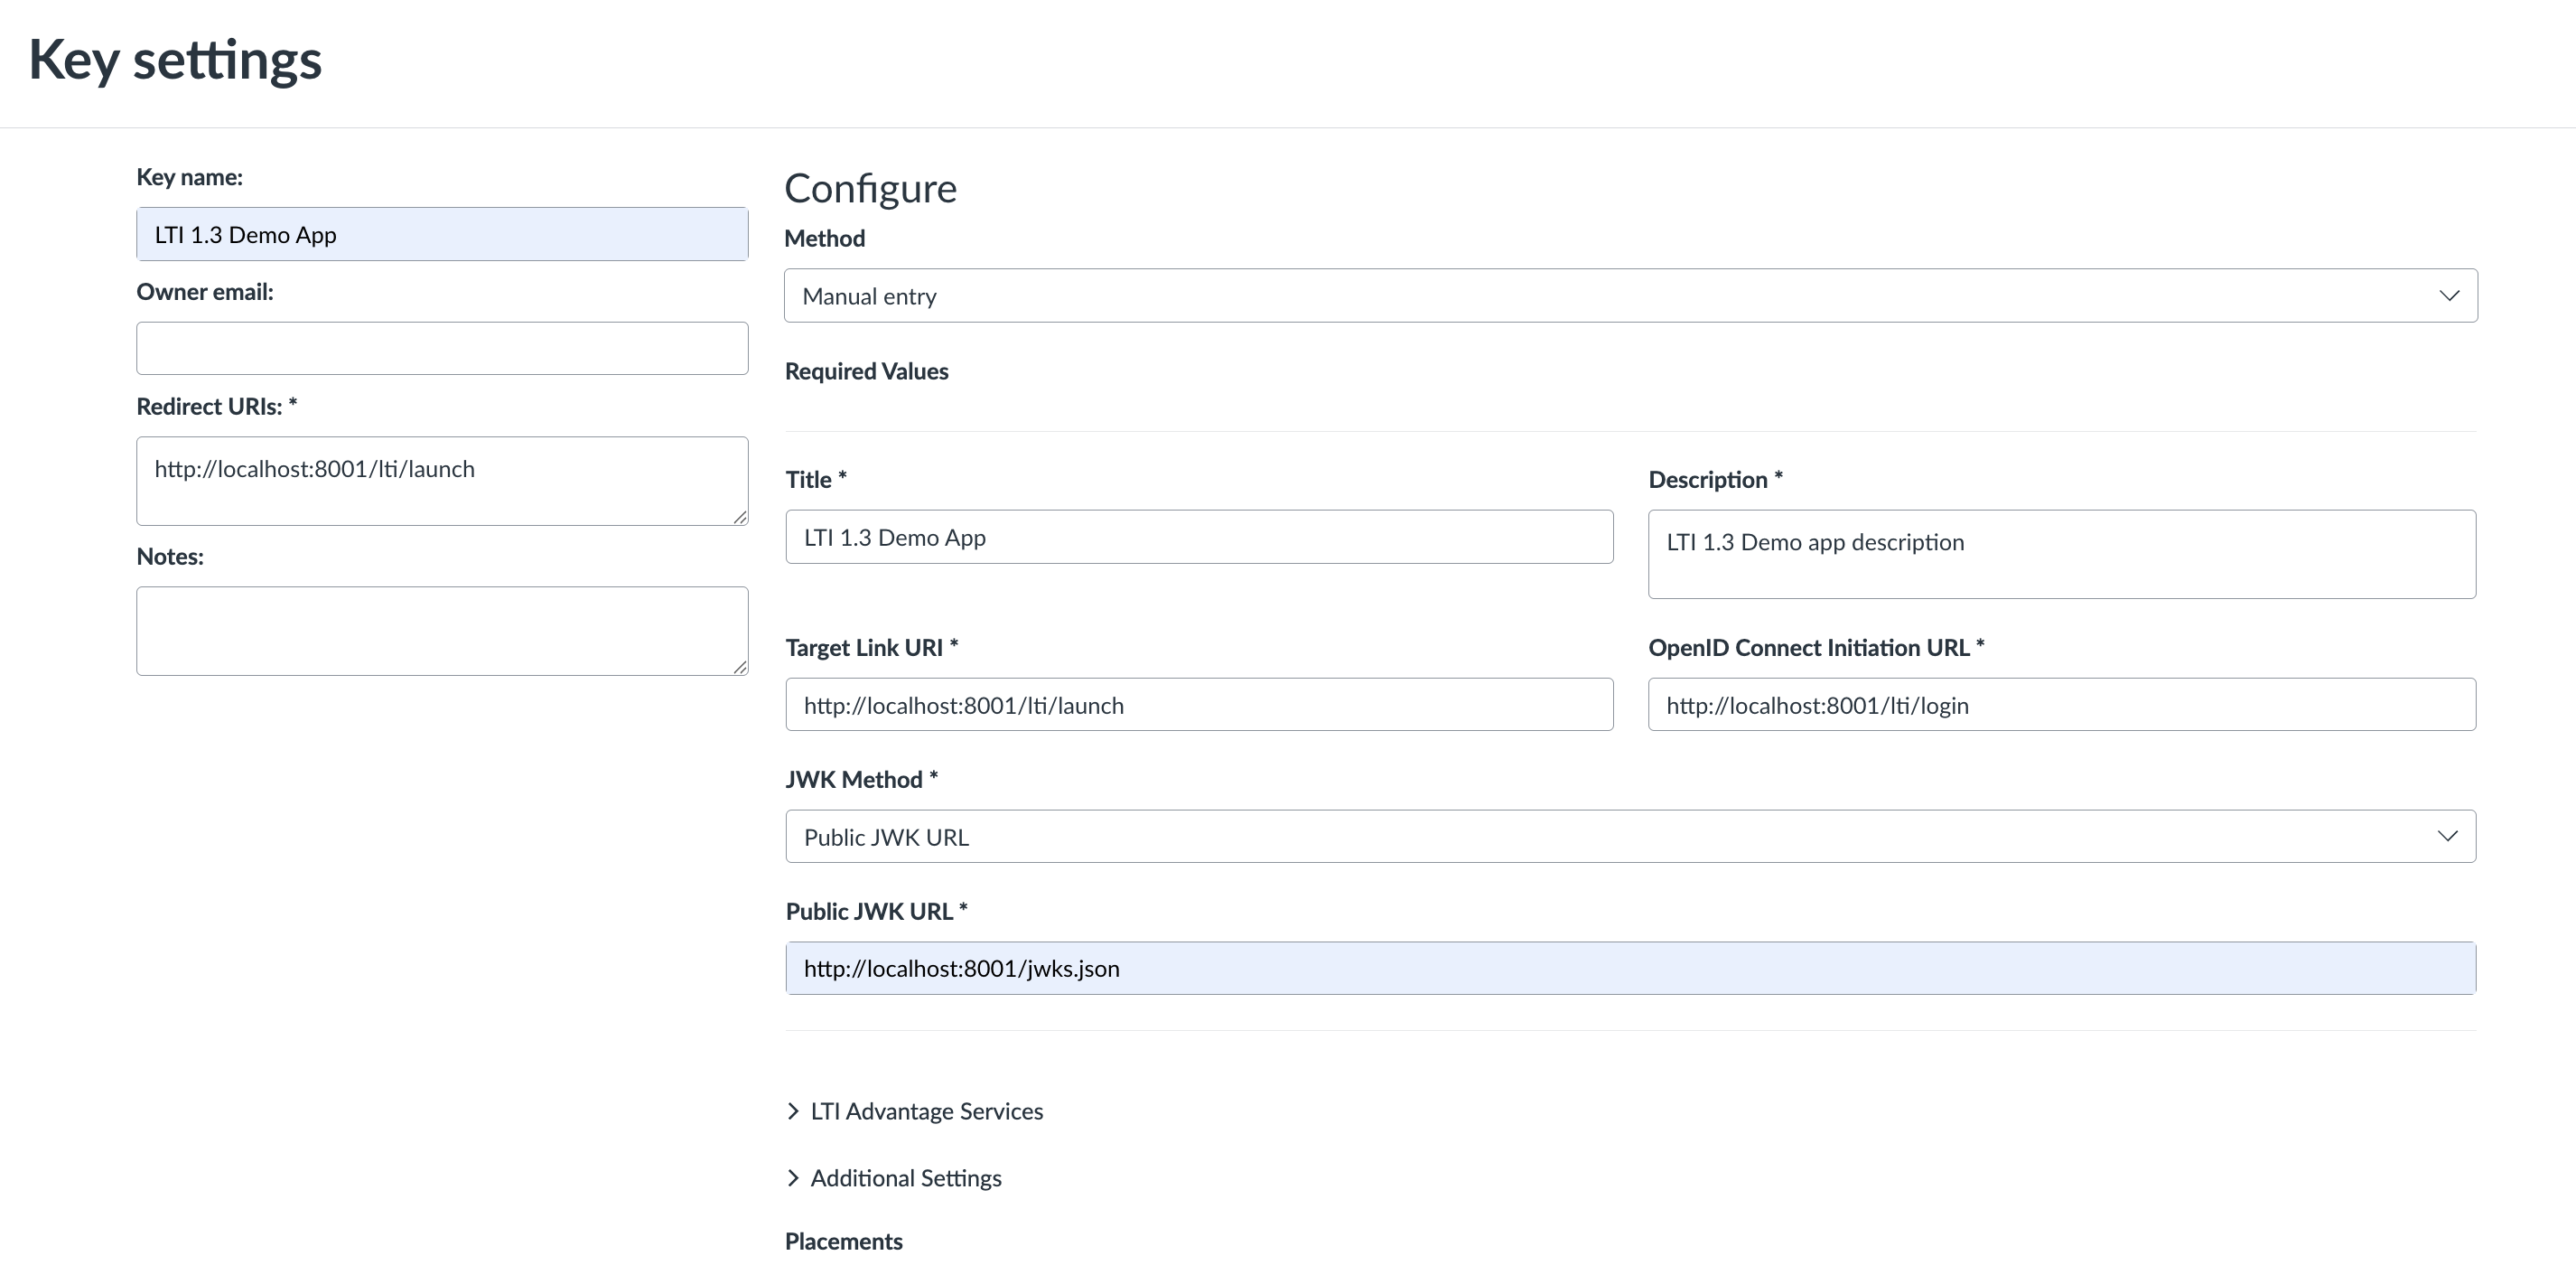
In the Key Settings screen, fill out the following fields
- Key Name → Name of your app (for admin reference).
- Redirect URIs → The URL Canvas will redirect to after login (e.g., http://localhost:8001/lti/launch).
- Target Link URI → The launch URL for your tool (Canvas will send this in the ID token).
- OpenID Connect Initiation URL → The login endpoint in your app (handles login initiation).
- JWKS URL → URL that serves your public keys so Canvas can verify JWT signatures.
Adding Custom Fields & Navigation Placements
Scroll down to Additional Settings and:
- Add Custom Fields to receive extra data like user email, full name, or course name in the ID token.
user_email=$Person.email.primary
user_name_full=$Person.name.full
canvas_course_name=$Canvas.course.name
- Choose your Navigation Placement (e.g., Course Navigation).
Note: The Target Link URI you set at the top is global. If you add a custom target link URI under a specific navigation placement, Canvas will send that instead — letting you redirect users based on where they launched your app (course nav, account nav, etc.).
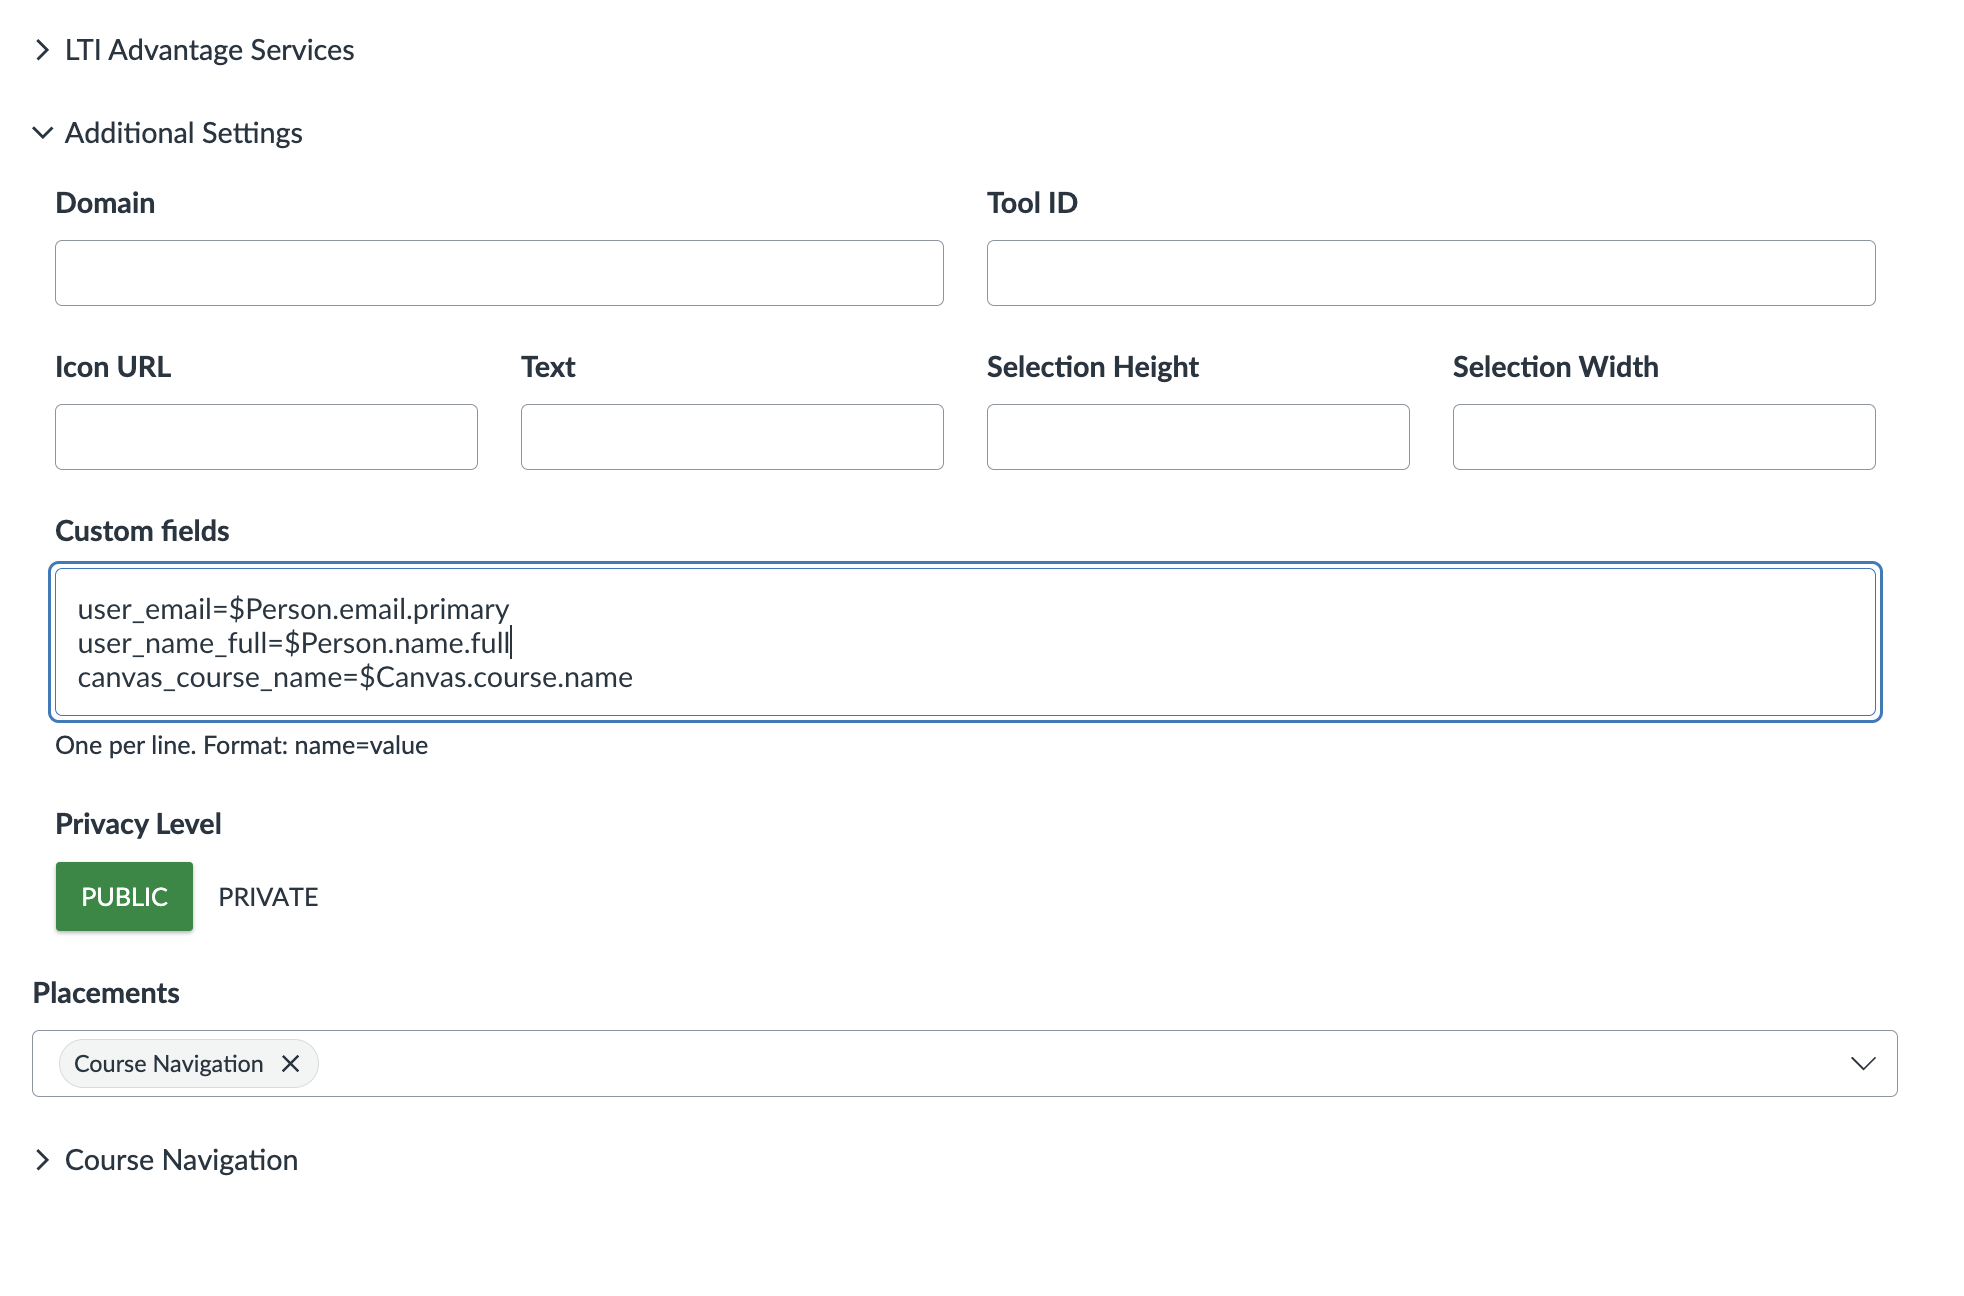
- Before saving, set the Privacy Level to Public and click Save to create your Developer Key.
🔗 Helpful References:
- Custom Fields → Explore how to include user and course info in LTI launches: Canvas LTI Variable Substitutions
- Navigation Placements → Explore all the places your tool can appear in Canvas: Canvas LTI Placements Overview
Step 3: Install the LTI 1.3 Tool in Canvas
Now that our developer key is created and configured, we need to enable it and install the app inside Canvas.
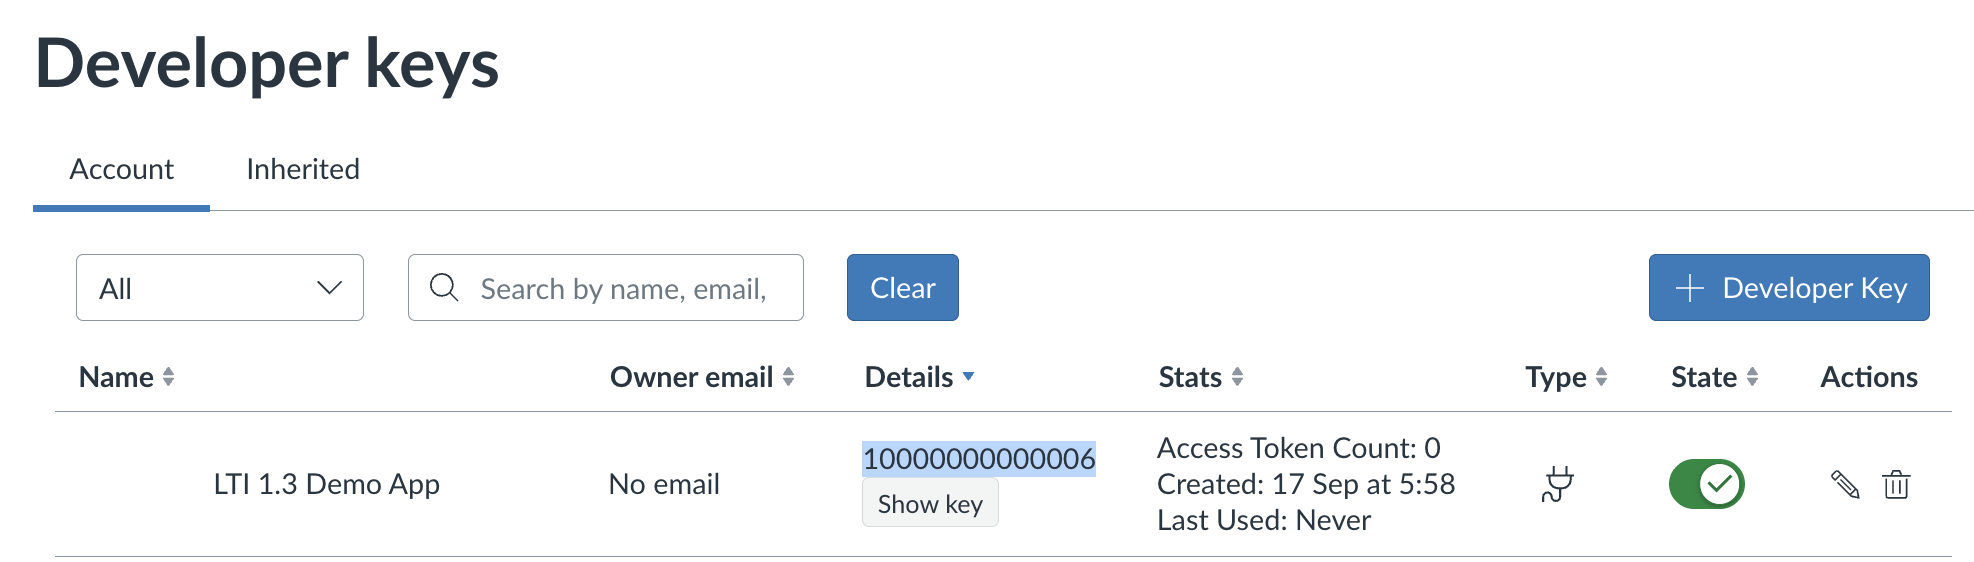
- Go to Admin → Developer Keys and find your newly created key.
- Toggle its state to ON ✅ so it can be used.
- Copy the Client ID shown under the Details column — we will need it for installation.
Add the App Using the Client ID
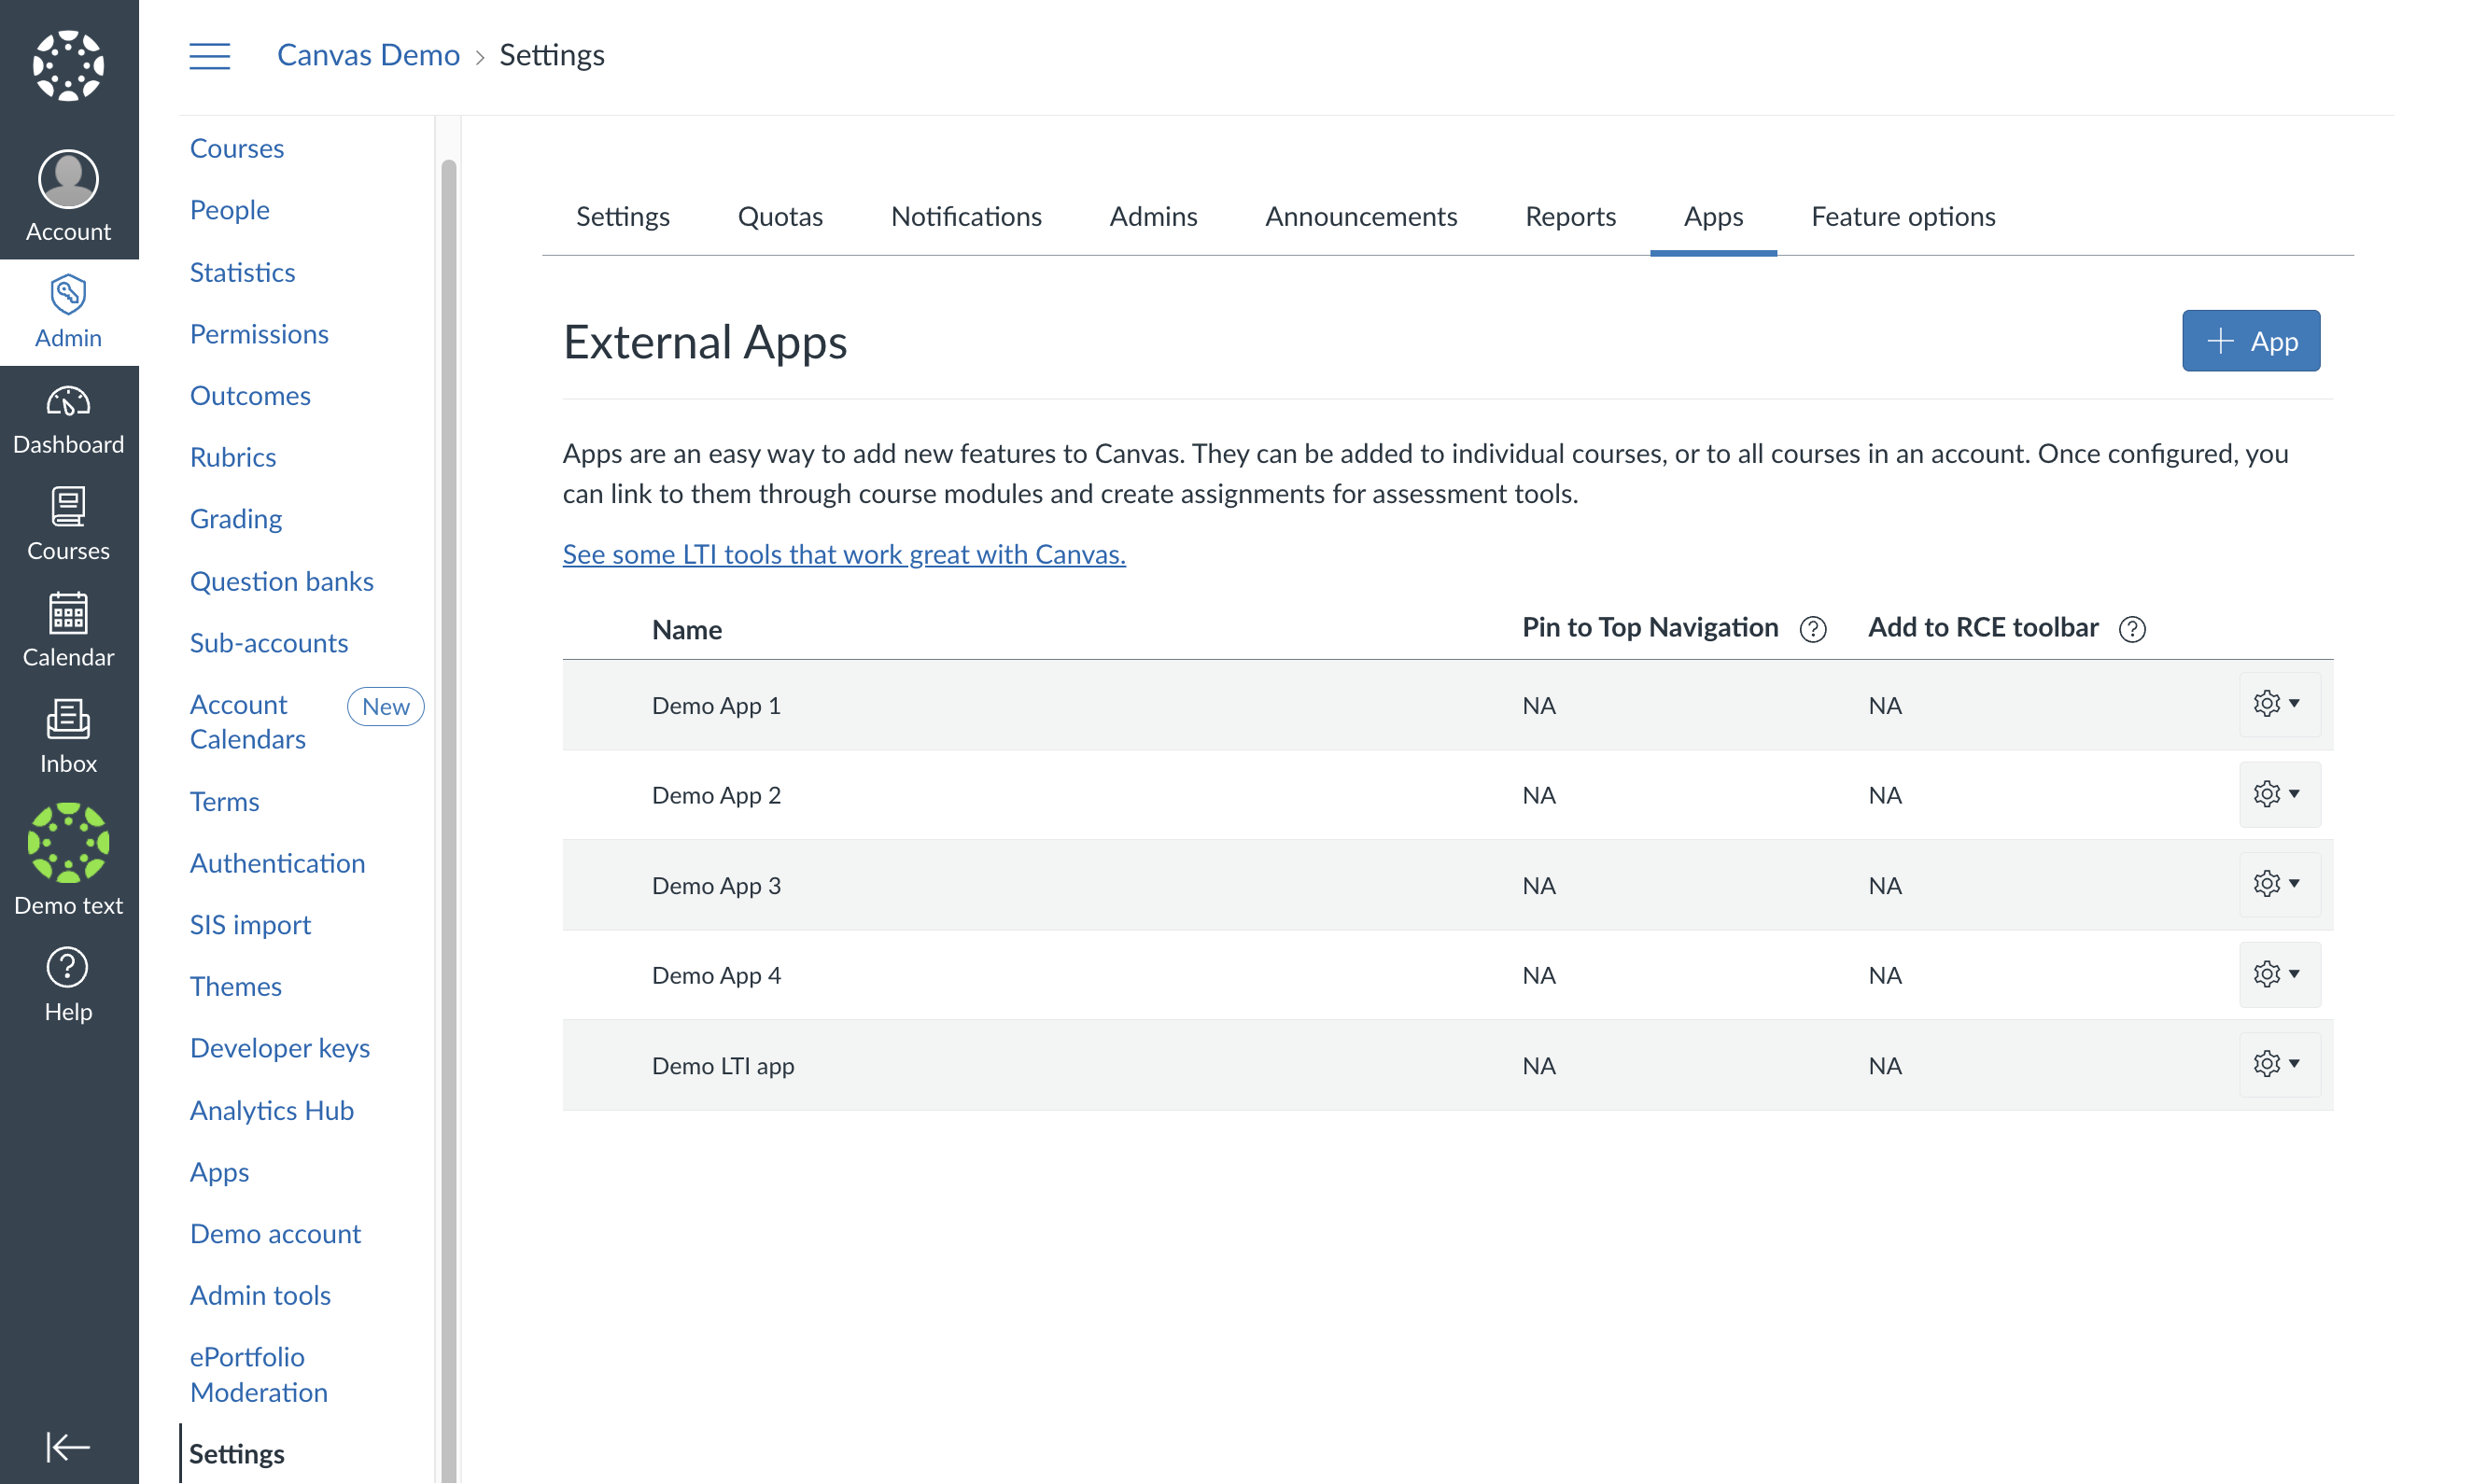
- In the same left-hand menu, go to Settings → Apps.
- Click + App to add a new external tool.
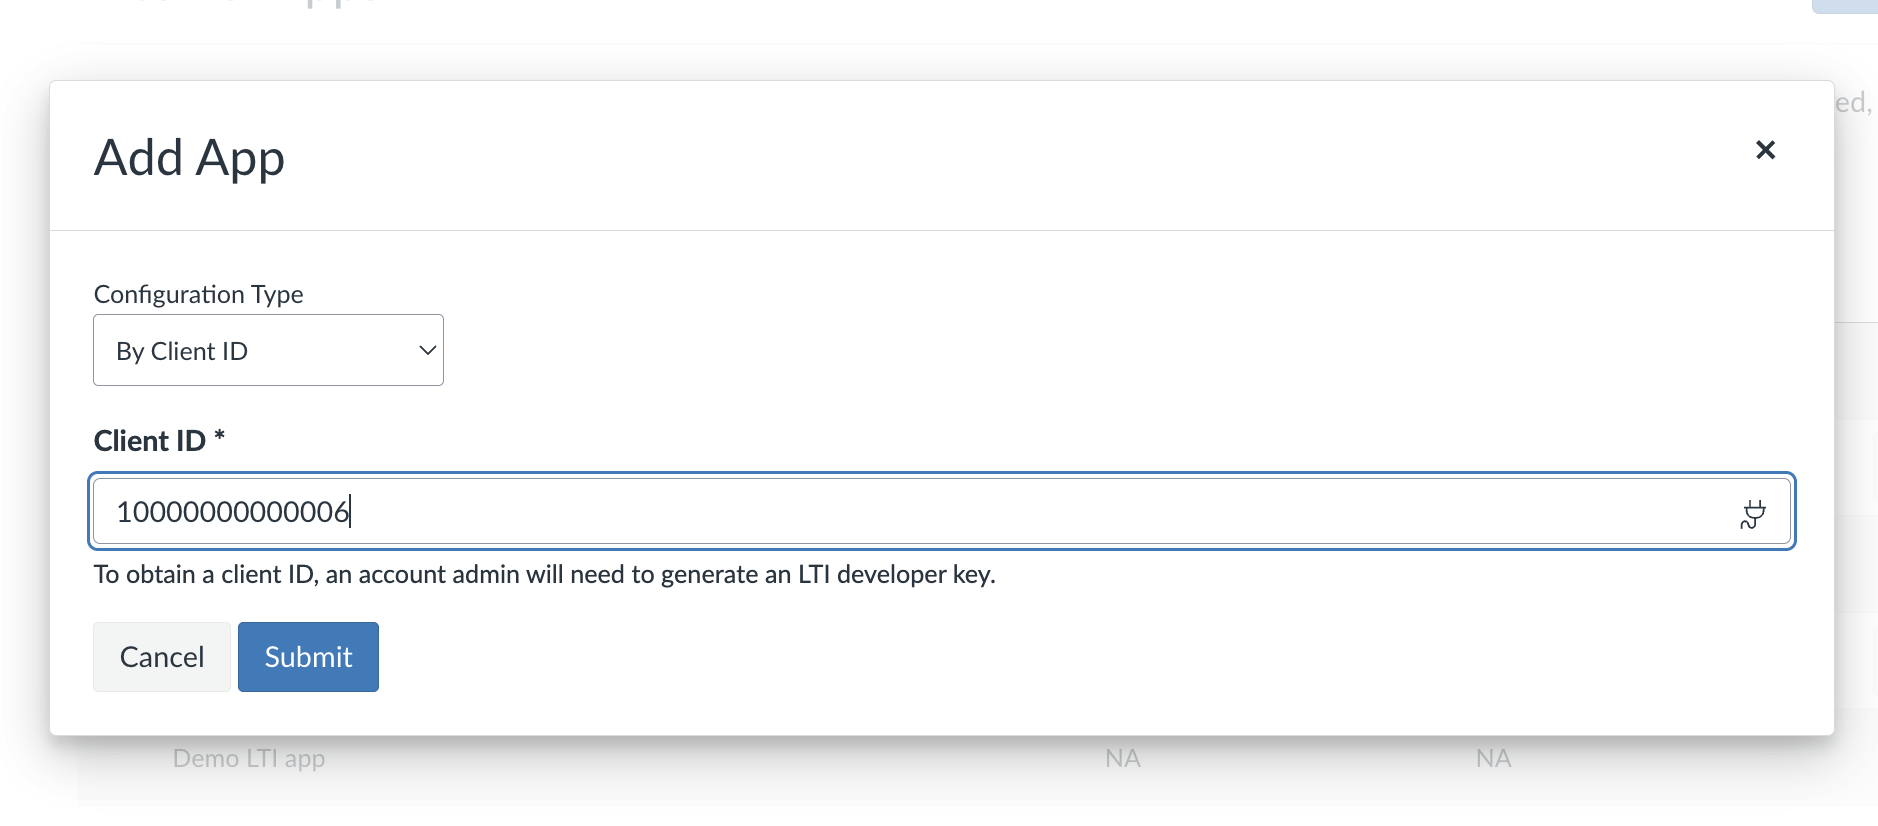
- In the Configuration Type dropdown, select By Client ID.
- Paste the Client ID you copied earlier and click Submit.
- Canvas will display the app details — click Install to complete the setup.
Step 4: Launch & Test the LTI 1.3 Tool
Before testing, make sure your LTI 1.3 app server is running.
- Go to any course page in Canvas (since we used Course Navigation).
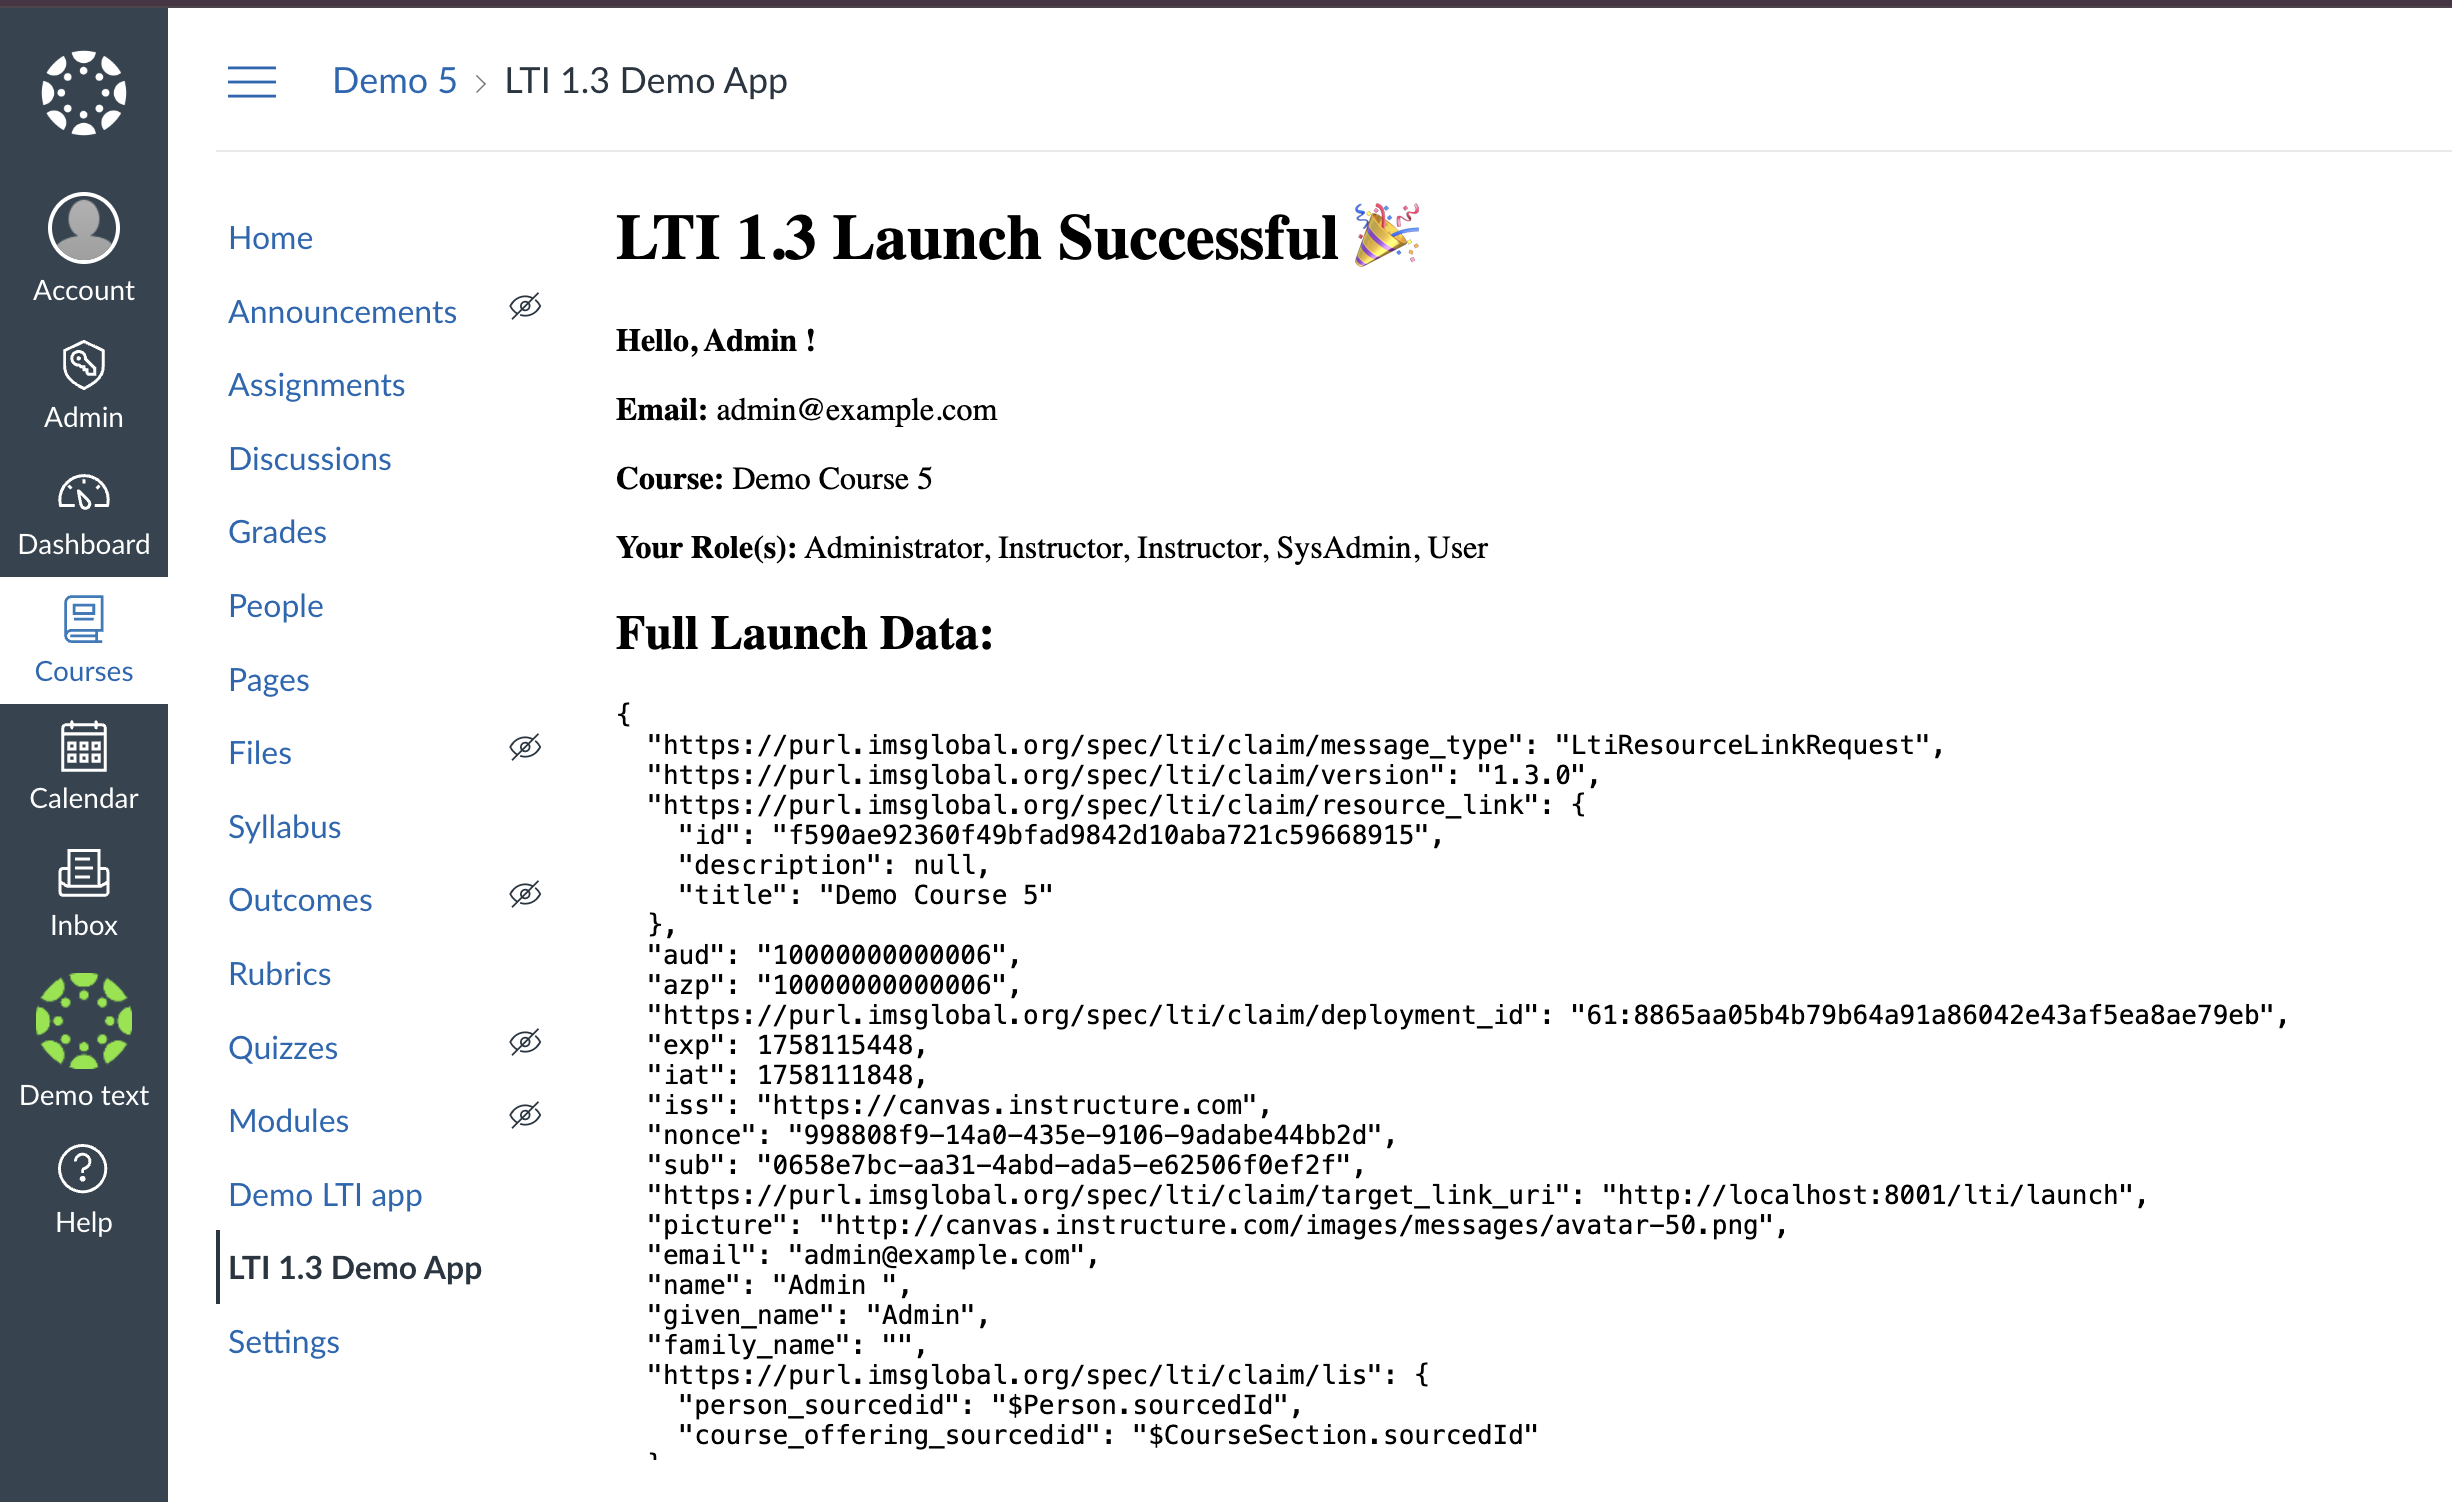
- In the course navigation sidebar, click your LTI app name — e.g., "LTI 1.3 Demo App".
- Your tool should open and display a "Launch Successful" message.
Troubleshooting Common Launch Errors
If you see one of these errors:
Error during LTI launch: Missing id_token or statelaunch_no_longer_valid – The launch has either expired or already been consumed
👉 Check out my separate guide on fixing these issues: 🔗 Troubleshooting LTI 1.3 Launch Error
Tip: If you make any changes to your Developer Key configuration, you must uninstall the LTI app and reinstall it for the changes to take effect. Then refresh the page before launching again.